From Hypothesis to Validation: A 2025 Guide to Experimental Techniques for Verifying Planck's Quantum Theory
This article provides a comprehensive overview of the experimental techniques that have verified and refined Planck's quantum theory, from its foundational origins to cutting-edge 2025 methodologies.
From Hypothesis to Validation: A 2025 Guide to Experimental Techniques for Verifying Planck's Quantum Theory
Abstract
This article provides a comprehensive overview of the experimental techniques that have verified and refined Planck's quantum theory, from its foundational origins to cutting-edge 2025 methodologies. Tailored for researchers, scientists, and drug development professionals, it explores the historical experiments that established quantum principles, details modern laboratory methods for determining fundamental constants like Planck's constant, and offers insights into optimizing measurement accuracy. By comparing the precision and application of various techniques, this review serves as a critical resource for applying quantum verification methods in advanced fields, including materials science and pharmaceutical research.
The Quantum Dawn: Foundational Experiments that Established a New Theory of Reality
A fundamental challenge in late 19th-century physics was theoretically predicting the spectrum of electromagnetic radiation emitted by a perfect blackbody—an ideal object that absorbs all incident radiation and emits energy based solely on its temperature [1]. Experimental measurements revealed a characteristic spectrum: intensity rises to a peak at a wavelength specific to the temperature and then falls off again, with the peak shifting to shorter wavelengths as temperature increases [2]. Classical physics, based on Newtonian mechanics and Maxwell's electromagnetism, failed to explain this complete spectrum. The prevailing theoretical framework, derived from the equipartition theorem, predicted that energy emission should increase without bound as wavelength decreases, leading to what was later termed the "ultraviolet catastrophe" – an unphysical prediction of infinite energy in the ultraviolet region of the spectrum [1] [2]. This discrepancy between theory and experiment represented a critical failure of classical physics and set the stage for a revolutionary proposal by Max Planck.
The Ultraviolet Catastrophe
The ultraviolet catastrophe, a term coined by Paul Ehrenfest in 1911, was the prediction from the Rayleigh-Jeans law that an ideal black body at thermal equilibrium would emit an unbounded quantity of energy at shorter wavelengths [1]. The Rayleigh-Jeans law, derived from classical statistical mechanics, applies the equipartition theorem, which states that each mode (degree of freedom) of an electromagnetic field in a cavity at equilibrium has an average energy of (kB T), where (kB) is the Boltzmann constant and (T) is the absolute temperature [1]. This leads to the spectral radiance as a function of wavelength (\lambda):
[B{\lambda}(T) = \frac{2ckB T}{\lambda^4}]
where (c) is the speed of light. The fatal flaw in this formulation is that the energy density increases without limit as the wavelength decreases ((\lambda \rightarrow 0)), or equivalently, as the frequency increases [1] [2]. Since the number of electromagnetic modes in a cavity is proportional to the square of the frequency, the total radiated power integrated over all frequencies becomes infinite, a result that contradicted experimental observations which showed the energy density dropping to zero at high frequencies [1].
Table: Comparison of Blackbody Radiation Laws
| Feature | Rayleigh-Jeans Law | Wien's Law | Planck's Law |
|---|---|---|---|
| Theoretical Basis | Classical equipartition theorem | Empirical fit | Quantum hypothesis |
| Spectral Radiance | (\frac{2c k_B T}{\lambda^4}) | (\frac{c1 T}{\lambda^5} e^{\frac{-c2}{\lambda T}}) | (\frac{2hc^2}{\lambda^5} \frac{1}{e^{\frac{hc}{\lambda k_B T}} - 1}) |
| Long Wavelength Accuracy | Accurate | Inaccurate | Accurate |
| Short Wavelength Accuracy | Fails catastrophically (→∞) | Accurate | Accurate |
| Prediction | Ultraviolet catastrophe | — | Correct full spectrum |
Planck's Quantum Hypothesis
In 1900, Max Planck derived the correct form for the spectral distribution of blackbody radiation by introducing a radical physical assumption: electromagnetic energy could be emitted or absorbed only in discrete packets, called quanta [1] [2]. Planck's quantum hypothesis stated that the energy (E) of a single quantum is proportional to the frequency (\nu) of the radiation:
[E = h \nu = \frac{hc}{\lambda}]
where (h) is a fundamental constant of nature, now known as Planck's constant ((h = 6.626 \times 10^{-34} \text{ J·s})) [2] [3]. Planck originally viewed this quantization as a mathematical formalism for the oscillators in the cavity walls rather than a property of light itself, an "act of desperation" to derive a formula that matched experimental data [1] [4]. By applying this quantum condition to Boltzmann's statistical treatment of entropy, Planck arrived at his famous radiation law:
[B{\lambda}(\lambda,T) = \frac{2hc^2}{\lambda^5} \frac{1}{\exp\left(\frac{hc}{\lambda kB T}\right) - 1}]
This equation perfectly described the observed blackbody spectrum across all wavelengths and temperatures [1] [2]. At long wavelengths, it reduces to the Rayleigh-Jeans law, while at short wavelengths, the exponential term in the denominator becomes dominant, causing the energy density to approach zero and thus avoiding the ultraviolet catastrophe [1].
Experimental Verification of Planck's Quantum Theory
The Photoelectric Effect
Although Planck's law successfully described blackbody radiation, his quantum hypothesis remained a mathematical abstraction until 1905, when Albert Einstein extended the concept by proposing that light itself consists of discrete quanta (later called photons) [1] [3]. Einstein applied this idea to explain the photoelectric effect, where light incident on a metal surface ejects electrons [5] [6]. Classical wave theory predicted that electron energy should increase with light intensity, but experiments showed that electron energy depends only on light frequency, with a threshold frequency below which no electrons are emitted regardless of intensity [3]. Einstein explained this by proposing that light energy arrives in discrete packets, with each photon transferring energy (E = h\nu) to a single electron [5] [3]. This explanation, later confirmed experimentally by Robert Millikan, provided crucial evidence for the physical reality of energy quanta and earned Einstein the Nobel Prize in 1921 [3].
Table: Key Experiments Verifying Quantum Theory
| Experiment | Key Researcher(s) | Year | Significance for Quantum Theory |
|---|---|---|---|
| Blackbody Radiation | Max Planck | 1900 | Required energy quantization to explain spectrum |
| Photoelectric Effect | Albert Einstein | 1905 | Supported particle nature of light; validated (E = h\nu) |
| Atomic Spectra | Niels Bohr | 1913 | Applied quantization to electron orbits in atoms |
| Franck-Hertz Experiment | James Franck, Gustav Hertz | 1914 | Demonstrated atomic energy level quantization |
| Compton Scattering | Arthur Compton | 1923 | Confirmed photon momentum |
Modern Determination of Planck's Constant
Contemporary physics continues to develop increasingly precise methods for determining Planck's constant, which since 2019 has been used to define the kilogram in the International System of Units (SI) [3] [7]. Modern experimental approaches include:
- Blackbody radiation measurements: Using precise spectroradiometry to measure the spectral distribution of a blackbody and fitting to Planck's law [7].
- Photoelectric effect: Measuring the stopping voltage for different light frequencies to determine (h) from the slope of the kinetic energy versus frequency graph [7].
- LED characterization: Analyzing the current-voltage characteristics of light-emitting diodes, where the turn-on voltage relates to the photon energy (hc/\lambda) [7].
- X-ray crystal density: Using crystal lattices as natural diffraction gratings to measure atomic spacings and determine (h) [3].
- Kibble balance: Employing electromagnetic force measurements that relate mechanical to electrical power, ultimately depending on (h$ [3].
Table: Experimental Methods for Determining Planck's Constant
| Method | Physical Principle | Key Measurements | Typical Uncertainty |
|---|---|---|---|
| Blackbody Radiation | Spectral distribution of thermal radiation | Radiant intensity at different wavelengths & temperatures | Medium |
| Photoelectric Effect | photon-electron energy transfer | Electron kinetic energy vs. light frequency | Medium |
| LED Characterization | Semiconductor band gap photon emission | Current-voltage characteristics & emission wavelength | Low-Medium |
| X-ray Crystal Density | X-ray diffraction & atomic spacing | Lattice spacing, molar volume, density | High |
| Kibble Balance | Electro-mechanical power equivalence | Current, voltage, velocity, force | Very High |
Experimental Protocols for Verifying Planck's Quantum Theory
Protocol 1: Determining Planck's Constant via Blackbody Radiation
Objective: Determine Planck's constant by measuring the emission spectrum of a blackbody radiator at known temperatures and fitting the data to Planck's radiation law.
Materials and Equipment:
- High-temperature blackbody cavity with precise temperature control
- Spectroradiometer with wavelength calibration
- Optical components (lenses, apertures, mirrors)
- Data acquisition system
- Standard reference lamp for calibration
Procedure:
- Calibrate the spectroradiometer using a standard reference lamp with known spectral irradiance.
- Set the blackbody cavity to a stable temperature (e.g., 2000K, 2500K, 3000K) and verify temperature uniformity.
- Measure the spectral radiance of the blackbody source across the wavelength range of 300 nm to 2500 nm.
- Repeat measurements for at least three different temperatures.
- For each wavelength, plot measured radiance versus temperature and fit to Planck's law:
[ B{\lambda}(T) = \frac{2hc^2}{\lambda^5} \frac{1}{e^{\frac{hc}{\lambda kB T}} - 1}]
- Perform a least-squares regression to determine the value of (h) that minimizes the difference between theoretical and measured spectra.
- Calculate uncertainty contributions from temperature measurement, wavelength accuracy, and radiance measurement.
Protocol 2: Verifying Quantization through the Photoelectric Effect
Objective: Verify the quantum nature of light and determine Planck's constant by measuring the kinetic energy of photoelectrons as a function of incident light frequency.
Materials and Equipment:
- Photoelectric effect apparatus with vacuum photocell
- Monochromatic light sources (LEDs or lasers) of different frequencies
- Variable DC power supply and voltmeter
- Current amplifier and picoammeter
- Frequency/wavelength measurement device (spectrometer or interferometer)
Procedure:
- Set up the photoelectric apparatus with the photocell connected to measure photocurrent.
- Select a light source of known frequency (\nu_1) and direct it onto the photocathode.
- Apply a reverse bias voltage between cathode and anode, gradually increasing until the photocurrent drops to zero (stopping potential (V_{s1})).
- Record the stopping potential for each light frequency.
- Repeat steps 2-4 for at least five different light frequencies spanning a wide range.
- Plot stopping potential (V_s) versus light frequency (\nu$.
- Apply linear regression to determine the slope (m) of the (V_s) vs. (\nu$line.
- Calculate Planck's constant using the relationship:
[ h = m \cdot e]
where (e) is the elementary charge.
- Determine the work function (\phi$of the cathode material from the intercept:
[ \phi = -e \cdot V_{\text{intercept}}]
Research Reagent Solutions and Essential Materials
Table: Essential Materials for Quantum Verification Experiments
| Material/Equipment | Function in Experiment | Specification Guidelines |
|---|---|---|
| High-Temperature Blackbody | Provides standardized thermal radiation source | Cavity with ε > 0.999; T range: 1000-3500K; stability: ±0.1K |
| Spectroradiometer | Measures spectral distribution of radiation | Wavelength range: 200-2500nm; resolution: <1nm; calibrated against NIST standards |
| Monochromator/Light Sources | Provides monochromatic light of specific frequencies | Bandwidth: <5nm; intensity stability: ±1%; known frequency calibration |
| Photocathode Materials | Emits electrons in photoelectric effect | Low work function (e.g., Cs-Sb, K-Cs-Sb); uniform coating; reproducible response |
| Precision Voltmeter | Measures stopping potential in photoelectric effect | High impedance (>10 GΩ); resolution: 0.1mV; accuracy: ±0.01% |
| Vacuum System | Maintains clean environment for photoelectric measurements | Pressure: <10⁻⁶ mbar; minimal hydrocarbon contamination |
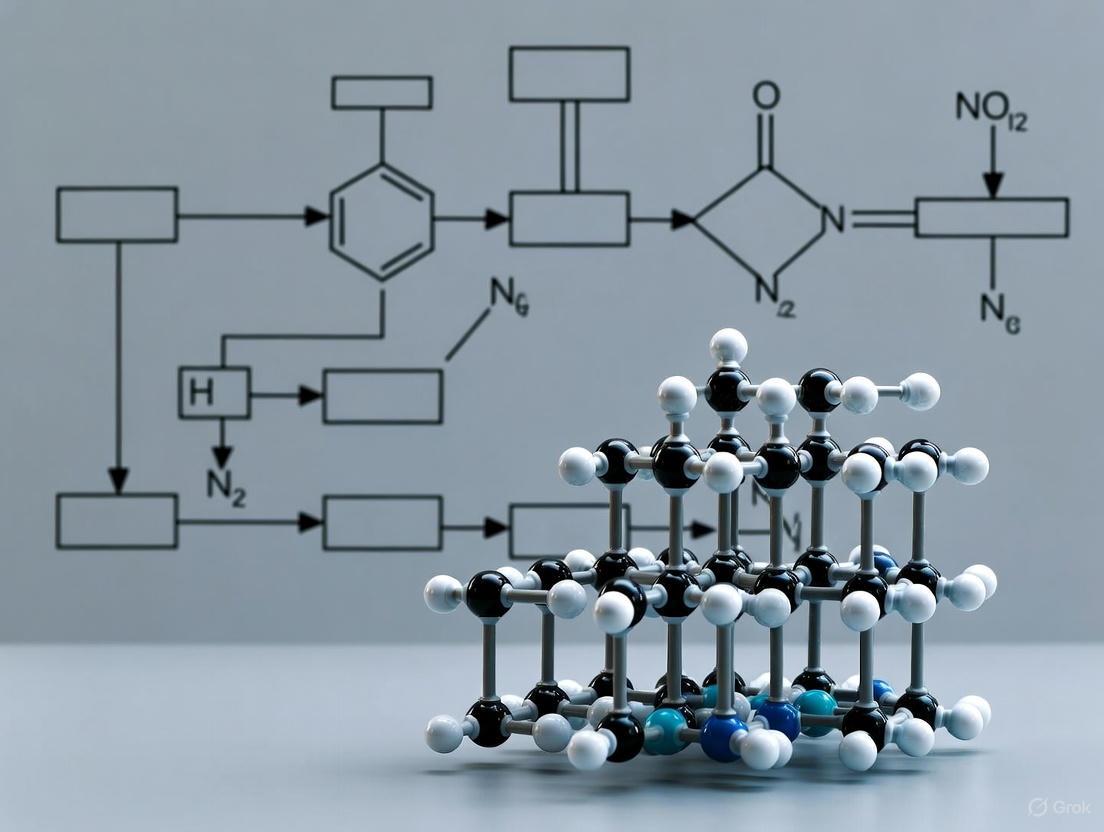
Visualization of Theoretical Framework and Experimental Approach
Diagram 1: Logical flow connecting the theoretical problem of ultraviolet catastrophe to Planck's quantum solution and subsequent experimental verification pathways.
Diagram 2: Generalized experimental workflow for determining Planck's constant, applicable to both blackbody radiation and photoelectric effect methodologies.
Planck's resolution of the ultraviolet catastrophe through the introduction of energy quantization represents a foundational moment in modern physics, marking the transition from classical to quantum theory. His radical proposal not only solved the specific problem of blackbody radiation but also established a new framework for understanding atomic and subatomic phenomena. The experimental protocols detailed herein provide methodologies for verifying the quantum hypothesis, with modern measurements of Planck's constant achieving extraordinary precision through techniques like Kibble balances and X-ray crystal density. These experimental approaches continue to validate Planck's quantum theory while driving advancements in measurement science. The enduring legacy of Planck's work is evident in its central role in redefining the International System of Units, demonstrating how a once-theoretical construct now underpins the most fundamental standards of measurement.
The dawn of the 20th century presented a formidable challenge to classical physics through the photoelectric effect, a phenomenon where light incident upon a metal surface ejects electrons [8]. Classical wave theory fundamentally failed to explain key observational characteristics: why electron ejection occurred immediately without a time delay, why the kinetic energy of ejected electrons depended on the light's frequency rather than its intensity, and why a threshold frequency existed below which no electrons were emitted regardless of intensity [9] [10]. In 1905, Albert Einstein provided the revolutionary explanation, proposing that light itself is quantized into discrete energy packets called "light quanta" (later termed photons) [11] [8]. This application note details the experimental protocols and theoretical framework for employing the photoelectric effect as a critical verification of Planck's quantum theory, providing researchers with methodologies to demonstrate the particle nature of light.
Theoretical Framework: Einstein's Quantum Model
Einstein's model postulated that a beam of light consists of discrete quanta (photons), each carrying an energy E proportional to its frequency f: E = hf, where h is Planck's constant [9] [10]. When such a photon strikes a metal surface, it can transfer all its energy to a single electron. The energy conservation governing this interaction is expressed by the photoelectric equation:
K_max = hf - W
Where:
K_maxis the maximum kinetic energy of the ejected photoelectron.hfis the energy of the incident photon.Wis the work function of the material, representing the minimum energy required to eject an electron from its specific metal surface [9] [8].
This equation successfully explains all observed properties of the effect: the existence of a threshold frequency f_0 (where hf_0 = W), the linear dependence of electron kinetic energy on the frequency of light, and the independence of this energy from the light intensity [10]. The intensity only affects the number of ejected electrons, not their maximum energy [9].
Energy Level Diagram
The following diagram illustrates the energy transfer process during the photoelectric effect, as described by Einstein's model.
Experimental Protocol and Methodology
This section provides a detailed protocol for verifying Einstein's photoelectric equation and measuring Planck's constant.
Research Reagent Solutions and Essential Materials
Table 1: Essential materials and equipment for photoelectric effect experiments.
| Item | Specification/Function |
|---|---|
| Photoelectric Tube | An evacuated glass tube containing an emitter electrode (E) made of the test metal (e.g., Cesium, Potassium) and a collector electrode (C). The vacuum prevents electron collisions with gas molecules [9]. |
| Monochromatic Light Source | A source that emits light of a single, known frequency. Xenon arc lamps with monochromators or ultraviolet lasers are commonly used [9]. |
| Set of Optical Filters | Used in conjunction with a broad-spectrum source to select specific narrow wavelength bands for frequency-dependent studies [9]. |
| Variable Power Supply & Voltage Meter | A precision voltage source and meter to apply and measure a variable retarding potential (positive or negative) between the emitter and collector electrodes [9] [10]. |
| Ammeter (Picoammeter) | A sensitive current meter to measure the small photoelectric current resulting from the flow of ejected electrons [9]. |
Experimental Workflow for Determining Planck's Constant
The following diagram outlines the core experimental procedure for investigating the photoelectric effect.
Protocol Steps:
- Apparatus Setup: Assemble the circuit with the photoelectric tube, ensuring a clean surface of the emitter electrode. The tube must be under vacuum to prevent electron scattering [9].
- Illuminate Emitter: Select a specific frequency using the monochromator or laser. The light should be directed onto the emitter electrode. Maintain a constant light intensity for all frequency measurements to isolate the frequency dependence.
- Measure Stopping Potential (
V_0): Apply a negative voltage (retarding potential) to the collector. Gradually increase this voltage until the photocurrent measured by the ammeter drops to zero. This voltage is the stopping potential,V_0[9] [10]. At this point, the maximum kinetic energy of the electrons is counteracted by the electric potential:K_max = e * V_0, whereeis the electron charge. - Repeat for Different Frequencies: Using the same metal emitter, repeat steps 2 and 3 for at least five different frequencies of light. Ensure the selected frequencies are both above and below the suspected threshold frequency.
- Data Analysis: For each frequency
f, you now have a correspondingV_0. PlotV_0versusf. According to Einstein's equation (e * V_0 = hf - W), the data should form a straight line. The slope of the best-fit line will beh/e, from which Planck's constanthcan be calculated. The x-intercept (V_0 = 0) gives the threshold frequencyf_0for that metal.
Data Presentation and Analysis
Quantitative Relationships in the Photoelectric Effect
Table 2: Key quantitative relationships and formulas in Einstein's photoelectric theory.
| Parameter | Symbol & Formula | Physical Significance | Experimental Observation |
|---|---|---|---|
| Photon Energy | E = hf |
Energy of a single light quantum (photon). | Determines the maximum kinetic energy an ejected electron can have. |
| Maximum Electron Kinetic Energy | K_max = hf - W |
Energy conservation for the photon-electron interaction. | Measured directly via the stopping potential: K_max = e * V_0 [10]. |
| Work Function | W = h f_0 |
Material-specific minimum ejection energy; defines threshold frequency f_0. |
Different metals have different threshold frequencies [9] [8]. |
| Stopping Potential | e V_0 = hf - W |
The potential difference that stops the most energetic photoelectrons. | Increases linearly with the frequency of incident light [9] [10]. |
Expected Experimental Outcomes
Table 3: Summary of experimental observations and their explanations via classical wave theory versus Einstein's quantum model.
| Experimental Observation | Prediction of Classical Wave Theory | Explanation via Einstein's Quantum Model |
|---|---|---|
| Threshold Frequency | No threshold; ejection should occur at any frequency given sufficient intensity [8]. | A photon must have minimum energy hf_0 = W to eject an electron. Below f_0, it is impossible [9]. |
| Kinetic Energy vs. Intensity | K_max should increase with increasing light intensity [8]. |
K_max depends only on photon energy (hf), not on the number of photons (intensity) [10]. |
| Electron Emission Time Delay | Significant time delay expected as electron "soaks up" energy [8]. | Emission is instantaneous because a single electron absorbs all energy from a single photon [10]. |
| Photocurrent vs. Intensity | Not directly specified, but would logically correlate. | The photocurrent is proportional to light intensity, as more photons eject more electrons [9] [10]. |
Advanced Applications and Modern Context
The principles of the photoelectric effect extend far beyond a foundational quantum experiment. They are the operational basis for a wide array of modern technologies. Photomultiplier tubes and avalanche photodiodes leverage the effect for single-photon detection in applications ranging from medical imaging (PET scanners) to astrophysical observations [9]. Solar cells operate on the photovoltaic effect, a closely related phenomenon, converting light energy directly into electrical current [10]. Furthermore, photoemission spectroscopy has become an indispensable tool in materials science and quantum chemistry. Techniques like Angle-Resolved Photoemission Spectroscopy (ARPES) directly probe the electronic band structure of solids by measuring the kinetic energy and momentum of photoelectrons, thereby inferring material properties such as conductivity and bonding characteristics [9].
The verification of the photoelectric effect was a cornerstone in the development of quantum mechanics, directly influencing Niels Bohr's model of the atom and the establishment of wave-particle duality by Louis de Broglie [8]. The conceptual framework of quantized energy transfer is now fundamental to emerging fields, including quantum information theory, which explores quantum computing, communication, and cryptography [12]. The study of complex quantum matter, such as topological phases and quantum magnets, also relies on these foundational principles, with research institutions worldwide focusing on their application in next-generation quantum simulators and computers [13].
The Franck–Hertz experiment, first presented to the German Physical Society on 24 April 1914, provided the first direct electrical measurement demonstrating the quantum nature of atoms [14]. This experiment emerged at a critical juncture in physics, following Max Planck's 1900 proposition that energy flows in discrete packets or "quanta" [15]. While Planck's quantum hypothesis successfully solved the blackbody radiation problem, it was initially viewed as a mathematical contrivance rather than a physical reality [15]. The Franck–Hertz experiment provided crucial experimental validation for the emerging quantum theory by demonstrating that atoms indeed possess discrete, quantized energy levels that cannot be explained by classical physics [14].
James Franck and Gustav Hertz designed a vacuum tube to study energetic electrons passing through mercury vapor, discovering that electrons could lose only specific quantities (4.9 electron volts) of kinetic energy when colliding with mercury atoms [14]. This finding directly contradicted classical expectations that electrons could transfer any arbitrary amount of energy to atoms. The experiment proved consistent with Niels Bohr's atomic model, published the previous year, which proposed that electrons inside atoms occupy specific "quantum energy levels" [14]. For their groundbreaking work, Franck and Hertz were awarded the 1925 Nobel Prize in Physics [14].
Theoretical Background: From Planck's Quantum to Bohr's Atom
Planck's Quantum Hypothesis
In 1900, Max Planck introduced a radical concept to solve the blackbody radiation problem: electromagnetic oscillators could only absorb or emit energy in discrete chunks rather than continuously [15]. His quantum hypothesis stated that energy E is proportional to frequency f: E = hf, where h is Planck's constant (approximately 6.626 × 10^-34 joule-seconds) [15]. Planck himself was initially uncertain about the physical reality of this quantization, viewing it as a mathematical necessity rather than a fundamental principle [15].
Bohr's Atomic Model
In 1913, Niels Bohr applied quantum ideas to atomic structure, proposing that electrons orbit nuclei only at specific discrete energy levels [15]. When electrons jump between these levels, they emit or absorb photons with energies exactly matching the energy difference between levels [15]. This explained why atoms produce sharp spectral lines rather than continuous spectra. The Bohr model became a precursor to quantum mechanics and the electron shell model of atoms [14].
The Connection
The Franck–Hertz experiment provided the missing experimental link between Planck's quantum hypothesis and Bohr's atomic model. It demonstrated directly that atoms indeed possess discrete energy levels and that energy transfers occur in quantized amounts, exactly as required by quantum theory [14].
Experimental Principles and Methodologies
Core Experimental Principle
The fundamental principle of the Franck–Hertz experiment involves studying electron-atom collisions in a low-pressure vapor environment [14]. When electrons accelerated by an electric field collide with atoms, they can undergo either elastic collisions (where no kinetic energy is lost) or inelastic collisions (where precise amounts of kinetic energy are transferred to the atoms) [14]. The experiment reveals that these energy transfers occur only in discrete quanta corresponding exactly to the difference between the atom's internal quantum energy levels [14].
Apparatus Design
The original Franck–Hertz apparatus used a heated vacuum tube containing a drop of mercury, maintained at approximately 115°C to achieve appropriate vapor pressure [14]. Contemporary setups for educational and research purposes typically use three key electrodes:
- A hot cathode that emits electrons via thermionic emission [14]
- A metal mesh grid maintained at a positive voltage relative to the cathode to accelerate electrons [14]
- An anode kept at a slightly negative potential relative to the grid to collect electrons that maintain sufficient kinetic energy after passing through the grid [14]
The electric current measured between the grid and anode provides data about electron-energy interactions within the tube [14].
Detection Mechanism
The experimental signature of quantum behavior appears as sharp dips in the measured anode current at specific accelerating voltages [14]. When the grid voltage reaches certain critical values (4.9V increments for mercury), electrons undergo inelastic collisions near the grid, losing precisely 4.9 eV of kinetic energy [14]. This energy loss leaves them with insufficient energy to overcome the small repelling voltage applied to the anode, causing the measured current to drop sharply [14]. At higher voltages, electrons can regain enough energy to suffer multiple inelastic collisions, creating a series of current dips at regular voltage intervals [14].
Visual Confirmation
In addition to electrical measurements, the experiment provides optical verification. Mercury atoms that have absorbed 4.9 eV of energy from electron collisions subsequently emit this energy as ultraviolet light with a wavelength of 254 nm [14]. For neon-filled tubes, the excitation results in visible red light emission, allowing direct observation of excitation zones within the tube [16].
Application Notes: Multi-Element Experimental Protocols
Mercury Vapor Setup
The original Franck–Hertz experiment used mercury vapor, which requires specific temperature conditions for proper operation [14] [17].
Table 1: Mercury Vapor Experimental Parameters
| Parameter | Specification | Function |
|---|---|---|
| Tube Temperature | 115°C | Maintains mercury vapor pressure of ~100 Pa [14] |
| Filament Voltage | Adjustable (typically 3-8V) | Controls electron emission rate [17] |
| Acceleration Voltage Range | 0-70V | Accelerates electrons through mercury vapor [14] |
| Retarding Voltage | ~1.5V | Selects only electrons with sufficient kinetic energy [14] |
| Characteristic Energy | 4.9 eV | First excitation energy for mercury atoms [14] |
| Emission Wavelength | 254 nm | Ultraviolet light emitted from excited mercury [14] |
Experimental Protocol for Mercury:
- Heat the vacuum tube to 115°C to vaporize mercury [14]
- Apply filament voltage to establish electron emission from cathode [14]
- Set retarding voltage to approximately 1.5V to establish energy selection criteria [14]
- Gradually increase acceleration voltage from 0V while monitoring anode current [17]
- Record current values at regular voltage intervals, noting sharp decreases
- Observe ultraviolet light emission at 254 nm using appropriate sensors [14]
Neon Gas Setup
Neon-filled Franck–Hertz tubes offer distinct advantages for educational demonstrations, including visible light emission and operation at room temperature [16].
Table 2: Neon Gas Experimental Parameters
| Parameter | Specification | Function |
|---|---|---|
| Tube Temperature | Room temperature | No heating required [16] |
| Filament Voltage | 6-8V AC | Heats cathode for electron emission [16] |
| Acceleration Voltage Range | 0-60V | Accelerates electrons through neon gas [16] |
| Reverse Bias Voltage | 1.5-10V | Selects electrons with sufficient energy [16] |
| Characteristic Energy | ~19 eV | First excitation energy for neon atoms [16] |
| Emission Spectrum | Red-orange light | Visible emission from excited neon atoms [16] |
Experimental Protocol for Neon:
- Connect the neon tube to control unit with color-coded banana plugs [16]
- Set filament voltage to 6-8V AC and allow 90-second warm-up [16]
- Apply reverse bias voltage of 1.5-10V between anode and collector [16]
- Connect oscilloscope in XY mode to display current-voltage characteristics [16]
- Gradually increase acceleration voltage while observing current on oscilloscope [17]
- Observe formation of glowing red layers in tube corresponding to excitation zones [16]
Argon Gas Setup
Argon provides another alternative for Franck–Hertz experiments with different characteristic energies.
Table 3: Argon Gas Experimental Parameters
| Parameter | Specification | Function |
|---|---|---|
| Tube Temperature | Room temperature | No heating required [17] |
| Filament Voltage | 3.5V | Optimizes electron emission without independent discharge [17] |
| Acceleration Voltage Range | 0-60V | Accelerates electrons through argon gas [17] |
| Retarding Voltage | 7.5V | Selects electrons with sufficient kinetic energy [17] |
| Current Multiplier | 10^-9 to 10^-11 A | Amplifies small current signals for measurement [17] |
Experimental Protocol for Argon:
- Set manual/auto switch to manual mode [17]
- Adjust filament voltage to 3.5V and current multiplier to 10^-9 [17]
- Set retarding voltage to approximately 7.5V [17]
- Increase grid voltage in 2V increments, recording current at each step [17]
- Use 1V increments near peaks and valleys for higher resolution [17]
- Allow system to stabilize after each voltage change before recording measurements [17]
Data Analysis and Interpretation
Characteristic Data Patterns
The signature result of a Franck–Hertz experiment is a series of regularly spaced dips in anode current at specific accelerating voltages [14]. For mercury, these dips occur at approximately 4.9V, 9.8V, 14.7V, and higher multiples of the first excitation energy [14]. Each dip corresponds to electrons undergoing an additional inelastic collision with mercury atoms, losing exactly 4.9 eV of kinetic energy each time [14].
Quantitative Analysis Method
To determine the characteristic energy accurately:
- Plot anode current (y-axis) versus acceleration voltage (x-axis) [17]
- Identify the voltage values at which current minima occur
- Plot peak number (or valley number) on the x-axis versus voltage on the y-axis [17]
- Calculate the slope of the resulting line, which represents the characteristic excitation energy [17]
- For neon, subtract the contact potential (approximately 2.5V for iron/barium cathodes) from acceleration voltage values [16]
Common Experimental Artifacts
Several factors can affect data quality:
- Contact potentials: Caused by different work functions of electrode materials, requiring voltage offset corrections [16]
- Space charge effects: Electron clouds around the cathode can distort low-voltage characteristics [14]
- Independent discharges: At high filament voltages, self-sustaining discharges may occur, recognizable by glow between cathode and control grid [16]
- Tube aging: Barium oxide cathodes degrade over time, reducing electron emission efficiency
Research Reagent Solutions and Essential Materials
Table 4: Essential Research Materials for Franck–Hertz Experiments
| Item | Specification | Function |
|---|---|---|
| Franck–Hertz Tube | Mercury, neon, or argon-filled | Contains vapor/gas for electron-atom collisions [14] [16] |
| Control Unit | Variable voltage sources + current amplifier | Provides operating voltages and measures tiny currents [16] |
| Oven Assembly | Temperature control to 115°C±5°C | Required for mercury vapor experiments [14] |
| Oscilloscope | XY display capability | Visualizes current-voltage characteristics in real-time [16] |
| Spectrometer | UV to visible range | Analyzes emission spectra from excited atoms [14] |
| Shielding | Electromagnetic isolation | Prevents external interference with sensitive current measurements [16] |
Experimental Workflow Visualization
The following diagram illustrates the complete experimental workflow for a Franck–Hertz experiment, from setup through data analysis:
Advanced Research Applications
Modern Metrological Applications
The principles underlying the Franck–Hertz experiment have influenced modern precision metrology. The accurate determination of fundamental constants, particularly Planck's constant, now employs techniques related to those pioneered by Franck and Hertz [18]. Modern watt balance experiments, which measure the Planck constant with uncertainties approaching a few parts in 10^8, represent a technological evolution of the basic concept of measuring quantum effects in electrical systems [18].
Material Science Applications
In drug development and material science, understanding electron-impact excitation and ionization processes remains crucial for analytical techniques such as:
- Mass spectrometry: Understanding electron-molecule interactions
- Surface analysis: Electron spectroscopy techniques
- Plasma processing: Relevant to pharmaceutical manufacturing
- Radiation therapy: Understanding energy deposition in biological materials
Troubleshooting and Optimization Guidelines
Common Experimental Challenges
- No current detected: Check filament operation, electrical connections, and tube integrity [16]
- Current decreases continuously: Adjust retarding voltage; may be too high [16]
- Irregular peak spacing: Check for external electromagnetic interference; ensure proper shielding [16]
- No visible glow in neon tube: Optimize filament voltage and acceleration voltage [17]
- Unstable current readings: Allow sufficient warm-up time (90+ seconds); check voltage stability [16]
Data Quality Optimization
- Filament voltage tuning: Adjust until filament glows dull orange without independent discharge [17]
- Retarding voltage optimization: Set between 1.5-10V to clearly resolve minima without excessive current suppression [16]
- Measurement timing: Allow system to stabilize after each voltage change before recording measurements [17]
- Multiple data sets: Collect data both manually and via oscilloscope for verification [16]
The Franck–Hertz experiment remains a cornerstone of experimental quantum mechanics, providing direct, reproducible evidence for quantized atomic energy levels. Its elegant demonstration that energy transfer at the atomic level occurs in discrete packets provided crucial validation for both Planck's quantum hypothesis and Bohr's atomic model [14] [15]. The experiment's methodology continues to influence modern precision measurements of fundamental constants [18], while its pedagogical value introduces new generations of researchers to quantum phenomena. For drug development professionals and researchers, understanding these quantum principles provides fundamental insights into atomic and molecular interactions that underpin modern analytical techniques and material characterization methods.
Compton scattering, the inelastic scattering of a high-frequency photon by a charged particle, typically an electron, represents a cornerstone experiment in modern physics. Discovered by Arthur Holly Compton in 1923, this quantum phenomenon provided conclusive evidence for the particle-like behavior of light, thereby fundamentally validating the wave-particle duality of photons [19]. Compton's experiments demonstrated that when X-rays scatter off electrons, their wavelength increases in a manner that depends on the scattering angle—an observation that classical wave theory could not explain. This effect was quantitatively described by the now-famous Compton scattering formula, which incorporates both quantum mechanics and special relativity [19]. The discovery earned Compton the Nobel Prize in Physics in 1924 and resolved a long-standing controversy about the nature of light by demonstrating that photons carry quantized energy and momentum [5] [19].
The profound significance of Compton's work lies in its decisive demonstration that electromagnetic radiation exhibits both wave-like and particle-like properties depending on the experimental context. While Thomas Young's double-slit experiment had convincingly demonstrated the wave nature of light through interference patterns, Compton scattering provided equally compelling evidence for its corpuscular character by showing that photon-electron collisions obey the conservation laws of energy and momentum, much like collisions between material particles [20] [19]. This dual nature of light lies at the heart of quantum mechanics and finds explicit formalization in Niels Bohr's complementarity principle, which states that the wave and particle aspects of quantum objects cannot be observed simultaneously [21] [20]. Compton scattering thus serves as an essential experimental pillar supporting the entire theoretical framework of quantum mechanics, making it indispensable for any serious investigation into experimental techniques for verifying Planck's quantum theory.
Theoretical Principles and Mathematical Framework
Fundamental Equations
The Compton effect is described by a remarkably elegant mathematical relationship that connects the wavelength shift of scattered photons to the scattering angle. The Compton scattering formula is expressed as:
[ \Delta \lambda = \lambda' - \lambda = \frac{h}{me c}(1 - \cos\theta) = \lambdaC (1 - \cos\theta) ]
where ( \lambda ) is the initial wavelength of the photon, ( \lambda' ) is the wavelength after scattering, ( h ) is Planck's constant, ( me ) is the electron rest mass, ( c ) is the speed of light, and ( \theta ) is the scattering angle of the photon [19] [22]. The quantity ( \frac{h}{me c} ), known as the Compton wavelength of the electron (( \lambdaC )), has a value of approximately ( 2.43 \times 10^{-12} ) m [19]. This formula demonstrates that the wavelength shift is minimal at ( \theta = 0^\circ ) (where ( \Delta \lambda = 0 )) and maximal at ( \theta = 180^\circ ) (where ( \Delta \lambda = 2\lambdaC )).
From an energy perspective, the relationship between the incident and scattered photon energies can be derived from the conservation laws and is given by:
[ E{\gamma'} = \frac{E\gamma}{1 + \frac{E\gamma}{me c^2}(1 - \cos\theta)} ]
where ( E\gamma ) is the energy of the incident photon and ( E{\gamma'} ) is the energy of the scattered photon [19] [22]. This energy-based formulation is often more practical in modern experimental settings where photon energies are directly measured rather than wavelengths.
Conservation Laws and Derivation
The Compton scattering formula is derived rigorously by applying the fundamental conservation laws of energy and momentum to the photon-electron collision system. The derivation treats the electron as initially stationary and unbound (or very loosely bound), with the photon possessing both energy ( E = hf ) and momentum ( p = hf/c ) before the interaction [19].
Energy Conservation: [ hf + mec^2 = hf' + \sqrt{(pe c)^2 + (m_e c^2)^2} ]
Momentum Conservation (x-component): [ \frac{hf}{c} = \frac{hf'}{c} \cos\theta + p_e \cos\phi ]
Momentum Conservation (y-component): [ 0 = \frac{hf'}{c} \sin\theta - p_e \sin\phi ]
where ( \phi ) is the recoil angle of the electron. By solving these equations simultaneously, one arrives at the Compton scattering formula, thereby demonstrating that the observed wavelength shift is a direct consequence of the photon transferring some of its energy and momentum to the electron during the collision [19].
Connection to Wave-Particle Duality
Compton scattering provides perhaps the most direct evidence for the particle-like aspect of electromagnetic radiation. The very fact that individual photons can collide with electrons like miniature billiard balls, obeying the classical conservation laws while exhibiting quantized energy and momentum, forcefully demonstrates the corpuscular nature of light [19] [23]. Conversely, other phenomena such as interference and diffraction in the double-slit experiment reveal light's wave-like character [21] [20]. This complementarity lies at the heart of quantum mechanics and finds its most striking manifestation in modern variants of foundational experiments where Compton scattering principles are integrated into interferometric setups to explore the trade-off between wave and particle behaviors [23].
Table 1: Key Physical Constants in Compton Scattering
| Quantity | Symbol | Value | Unit |
|---|---|---|---|
| Planck's Constant | ( h ) | ( 6.626 \times 10^{-34} ) | J·s |
| Electron Rest Mass | ( m_e ) | ( 9.109 \times 10^{-31} ) | kg |
| Speed of Light | ( c ) | ( 2.998 \times 10^8 ) | m/s |
| Compton Wavelength | ( \lambda_C ) | ( 2.426 \times 10^{-12} ) | m |
| Electron Rest Energy | ( m_e c^2 ) | ( 511 ) | keV |
Experimental Protocols and Methodologies
Standard Compton Scattering Experiment
The verification of Compton's formula through measurement of scattered photon energies across various angles remains a fundamental experiment in modern physics laboratories. The following protocol outlines the standardized procedure for conducting this experiment, based on established instructional methodologies [22].
Apparatus and Setup:
- Radioactive Source: A ¹³⁷Cs source emitting 661.6 keV gamma rays, housed in a lead shield with collimator.
- Scatterer: Aluminum or plastic target containing low-Z elements.
- Detector: NaI(Tl) scintillation detector coupled to a photomultiplier tube.
- Signal Processing: Preamplifier, amplifier, and multichannel analyzer (MCA) system.
- Goniometer: Precision angular measurement platform for positioning the detector.
Calibration Procedure:
- Place a calibration source (⁶⁰Co) in front of the detector without the scatterer present.
- Acquire spectrum for sufficient time to resolve the 1173 keV and 1332 keV characteristic peaks.
- Establish energy calibration of the MCA system using these known peaks.
- Ensure detector electronics remain unchanged throughout the experiment.
Data Acquisition Protocol:
- Position the scatterer at the center of the experimental setup.
- Set the detector to 0° reference position and verify alignment.
- For each scattering angle from 20° to 120° in 20° increments:
- Accurately position the detector at the target angle.
- Acquire spectrum with scatterer for the recommended time.
- Acquire background spectrum without scatterer for identical duration.
- Record all spectra in SPE (ASCII) format for subsequent analysis.
Table 2: Recommended Data Acquisition Parameters
| Scattering Angle (degrees) | Acquisition Time (minutes) | Primary Measurement |
|---|---|---|
| 20 | 4 | Initial wavelength shift |
| 40 | 4 | Progressive shift |
| 60 | 10 | Intermediate angles |
| 80 | 10 | Near-90° reference |
| 100 | 10 | Large angle scattering |
| 120 | 10 | Maximum wavelength shift |
Advanced Application: Compton Scattering Interferometry
Recent theoretical work has proposed innovative applications of Compton scattering principles to investigate wave-particle duality in interferometric setups. These advanced protocols extend beyond traditional scattering experiments to explore fundamental quantum principles [23].
Mach-Zehnder Interferometer with Compton-Type Beam Splitter:
- Replace the conventional first beam splitter in a Mach-Zehnder interferometer with a Compton scattering element.
- Utilize a low-mass scatterer (effectively a single electron) that recoils when interacting with incident photons.
- The photon scattering angle (θ = 0 or θ = π/2) determines the path through the interferometer.
- The wavelength change of the photon due to Compton scattering encodes which-path information.
- Measure interference pattern visibility at the output while monitoring photon wavelength shifts.
- Correlate the degradation of interference pattern with the acquisition of which-path information through wavelength measurements.
This sophisticated approach demonstrates the profound connection between information acquisition and the manifestation of wave versus particle behavior in quantum systems, directly testing the complementarity principle through Compton scattering phenomena [23].
Visualization of Concepts and Workflows
Compton Scattering Process and Conservation Laws
The following diagram illustrates the fundamental Compton scattering process, highlighting the key parameters and conservation laws governing the interaction between a photon and an electron.
Compton Scattering Process Visualization
Experimental Setup and Workflow
The following diagram illustrates the standard experimental apparatus and workflow for conducting Compton scattering measurements, showing the key components and their spatial relationships.
Compton Scattering Experimental Setup
Data Analysis and Interpretation
Spectral Processing and Analysis Protocol
The analysis of Compton scattering data requires meticulous processing to extract accurate energy values of scattered photons and verify the theoretical predictions.
Spectrum Calibration and Background Subtraction:
- Apply the energy calibration obtained from the ⁶⁰Co reference spectrum to all experimental spectra.
- For each scattering angle, subtract the background spectrum (without scatterer) from the corresponding spectrum with scatterer, ensuring identical acquisition times or correcting for time differences.
- The resulting difference spectrum represents the energy distribution of photons scattered exclusively from the target material.
Photo Peak Analysis:
- Identify the prominent photo peak in each difference spectrum corresponding to elastically scattered photons.
- Fit a Gaussian function to the photo peak to determine its centroid position with high precision.
- Convert the centroid channel number to energy using the established calibration.
- Calculate the ratio ( E0/Ef ) for each scattering angle, where ( E0 ) is the initial photon energy (661.6 keV for ¹³⁷Cs) and ( Ef ) is the measured scattered photon energy.
Verification of Compton Formula:
- Plot ( E0/Ef ) versus ( (1 - \cos\theta) ) for all scattering angles.
- Perform linear regression analysis on the data.
- According to Compton's formula, the relationship should be linear: ( \frac{E0}{Ef} = 1 + \frac{E0}{me c^2}(1 - \cos\theta) )
- The slope of the linear fit yields the experimental value of ( \frac{E0}{me c^2} ), from which the electron mass can be determined and compared with the accepted value of 511 keV/c².
Table 3: Expected Energy Shifts for 661.6 keV Photons
| Scattering Angle θ (degrees) | Theoretical Energy (keV) | Wavelength Shift Δλ (pm) |
|---|---|---|
| 0 | 661.6 | 0.00 |
| 20 | 650.2 | 0.04 |
| 40 | 620.5 | 0.16 |
| 60 | 580.6 | 0.36 |
| 80 | 538.5 | 0.58 |
| 100 | 500.0 | 0.81 |
| 120 | 467.8 | 1.02 |
Interpretation in Context of Wave-Particle Duality
The successful verification of Compton's formula provides compelling evidence for several foundational quantum mechanical concepts:
Photon Momentum Validation: The angular dependence of the wavelength shift unequivocally demonstrates that photons carry momentum ( p = h/\lambda ), a key prediction of quantum theory that has no counterpart in classical electrodynamics [19].
Particle Nature of Light: The observation that individual photon-electron collisions obey the conservation laws of energy and momentum strongly supports the particle-like description of electromagnetic radiation, complementing wave-based explanations of other phenomena like interference and diffraction [19] [23].
Complementarity Principle: Modern experiments that incorporate Compton scattering concepts into interferometric setups demonstrate the delicate trade-off between obtaining which-path information (particle character) and observing interference patterns (wave character). When Compton scattering provides unambiguous information about the photon's path, the interference pattern is necessarily degraded, beautifully illustrating Bohr's complementarity principle [23].
Information-Theoretic Perspectives: Contemporary interpretations view the Compton effect through the lens of information theory, where the acquisition of which-path information via the photon's wavelength change fundamentally alters the observable behavior of the quantum system, connecting to Wheeler's concept of "it from bit" – that physical reality arises from elementary information-theoretic processes [20].
The Scientist's Toolkit: Essential Research Materials
Table 4: Key Research Reagents and Equipment for Compton Scattering Studies
| Item | Specifications | Function/Application |
|---|---|---|
| Gamma Source | ¹³⁷Cs, 661.6 keV emission | Provides monochromatic high-energy photons for scattering experiments |
| Scintillation Detector | NaI(Tl) crystal with PMT | High-efficiency gamma radiation detection with good energy resolution |
| Multichannel Analyzer | Digital pulse height analyzer | Converts analog detector signals to digital energy spectra |
| Calibration Source | ⁶⁰Co with 1173 keV and 1332 keV peaks | Energy calibration reference for detector system |
| Scattering Targets | Low-Z materials (Al, plastic) | Provides loosely-bound electrons for Compton scattering |
| Lead Shielding | Collimated apertures | Defines photon beams and protects from unnecessary exposure |
| Goniometer | Precision angular positioning | Accurate measurement of scattering angles |
Compton scattering remains an essential experimental technique for verifying the foundational principles of quantum mechanics, particularly Planck's quantum hypothesis and the wave-particle duality of light. The precise agreement between theoretical predictions and experimental measurements of the Compton wavelength shift provides one of the most compelling validations of the quantum nature of electromagnetic radiation. Furthermore, contemporary research continues to find novel applications of Compton scattering principles in probing fundamental quantum phenomena, from testing complementarity in interferometric setups to studying electron momentum distributions in materials [24] [23].
The enduring significance of Compton scattering in modern physics research stems from its unique position as a conceptually straightforward yet profoundly meaningful demonstration of quantum principles. Its experimental accessibility makes it an indispensable component of advanced physics education, while its theoretical richness continues to inspire new investigations into the nature of quantum reality. As we celebrate a century of quantum mechanics, Compton's elegant experiment remains as relevant today as it was in 1923, continuing to validate Planck's quantum theory and illuminate the mysterious dual nature of light.
The Stern-Gerlach experiment, conceived by Otto Stern in 1921 and first successfully conducted with Walther Gerlach in early 1922, provided the first direct experimental evidence for the spatial quantization of angular momentum [25]. This groundbreaking experiment demonstrated that an atomic-scale system possesses intrinsically quantum properties, fundamentally challenging classical physics predictions and playing a decisive role in convincing physicists of the reality of angular-momentum quantization in all atomic-scale systems [25].
At the time of the experiment, the Bohr-Sommerfeld model prevailed as the dominant atomic model, describing electrons as occupying certain discrete atomic orbitals but not predicting the quantized nature of angular momentum orientation [25]. The Stern-Gerlach experiment was specifically designed to test the Bohr-Sommerfeld hypothesis that the direction of the angular momentum of a silver atom is quantized [25]. The results not only confirmed spatial quantization but also revealed properties of what would later be identified as electron spin, though the concept of electron spin itself wasn't formulated until 1925 by Uhlenbeck and Goudsmit [25].
Theoretical Framework
Classical Predictions vs. Quantum Reality
In classical physics, a magnetic dipole moving through an inhomogeneous magnetic field would experience a force proportional to the field gradient. For a collection of classical spinning objects with random orientation, one would expect a continuous distribution of magnetic moment vectors, resulting in a continuous smear on the detector screen as particles are deflected by varying amounts proportional to the dot product of their magnetic moments with the external field gradient [25].
Quantum mechanics, however, predicts discrete outcomes. For spin-½ particles like electrons, only two discrete angular momentum values are possible when measured along any axis: +ℏ/2 or -ℏ/2 [25]. This fundamental difference between continuous classical predictions and discrete quantum outcomes forms the core significance of the Stern-Gerlach experiment.
Quantum Mechanical Formalism
The state of a spin-½ particle can be described using Dirac's bra-ket notation as a superposition of the two possible spin states:
|ψ⟩ = c₁|ψⱼ=+½⟩ + c₂|ψⱼ=-½⟩
where c₁ and c₂ are complex coefficients with |c₁|² + |c₂|² = 1 [25]. The probabilities of measuring spin-up or spin-down are given by |c₁|² and |c₂|² respectively. When a measurement is performed, the system collapses into one of the two eigenstates, demonstrating the fundamental probabilistic nature of quantum measurement [25].
Table: Key Differences Between Classical and Quantum Predictions
| Aspect | Classical Prediction | Quantum Result |
|---|---|---|
| Deflection Pattern | Continuous distribution | Discrete bands |
| Possible Orientations | Continuous range | Quantized (e.g., ±½ for spin-½) |
| Angular Momentum | Random and continuous | Quantized spatial orientation |
| Measurement Outcome | Deterministic | Probabilistic |
Experimental Protocol
Apparatus and Reagents
Table: Essential Research Reagents and Materials
| Item | Function/Description |
|---|---|
| Silver Atoms | Neutral particles to avoid Lorentz force deflections that would overwhelm spin-dependent effects [25] |
| Electric Furnace | Device for evaporating silver atoms in a vacuum environment [25] |
| Collimating Slits | Creates a flat, well-defined atomic beam [25] |
| Inhomogeneous Magnet | Produces spatially varying magnetic field crucial for spin-dependent deflection [25] |
| Detector Screen | Glass slide or metallic plate for observing atomic deposition patterns [25] |
| Vacuum Chamber | Provides uncontaminated environment for atom propagation |
Step-by-Step Methodology
Atom Evaporation: Heat silver in an electric furnace within a vacuum chamber to produce a stream of neutral silver atoms [25].
Beam Collimation: Direct the atomic stream through thin slits to create a flat, well-defined beam [25].
Magnetic Deflection: Pass the collimated atomic beam through the strongly inhomogeneous magnetic field. The field gradient exerts a net force on atoms with magnetic moments, deflecting them from a straight path [25].
Detection: Allow the deflected atoms to impinge on a detector screen (typically a glass slide or metallic plate) where they condense and form a visible deposition pattern [25].
Pattern Analysis: Examine the deposition pattern to determine the spatial distribution of deflected atoms.
Critical Parameters and Optimization
- Particle Selection: Using electrically neutral particles (silver atoms) is crucial to avoid the large Lorentz force deflections that charged particles experience when moving through magnetic fields, which would mask the much smaller spin-dependent effects [25].
- Field Inhomogeneity: A strongly inhomogeneous magnetic field is essential, as a homogeneous field would exert equal but opposite forces on both ends of the dipole, resulting in torque and precession but no net deflection [25].
- Beam Collimation: Proper collimation ensures a well-defined initial trajectory, enabling precise measurement of deflections.
- Vacuum Quality: Sufficient vacuum prevents atomic collisions and scattering that would obscure the results.
Data Presentation and Analysis
Quantitative Results and Interpretation
The Stern-Gerlach experiment produces definitive quantitative outcomes that directly demonstrate quantum behavior:
Table: Experimental Outcomes and Their Significance
| Observation | Classical Prediction | Actual Result | Interpretation |
|---|---|---|---|
| Number of Beams | Single continuous band | Two discrete bands | Spatial quantization of angular momentum |
| Deflection Magnitude | Continuous range | Specific, discrete amount | Quantized magnetic moments |
| Beam Intensity | Varies continuously | Equal intensity for both beams | Equal probability of ± spin states |
| Reproducibility | Same distribution | Consistently two discrete bands | Fundamental quantum behavior |
The original experiment revealed that when the magnetic field was null, silver atoms deposited as a single band. As the field strength increased, this band widened and eventually split into two distinct bands, creating what was described as a "lip-print" pattern with an opening in the middle and closure at either end [25]. Statistical analysis showed that approximately half of the silver atoms were deflected upward and half downward, corresponding to the two possible spin states [25].
Sequential Experiments and Quantum Measurement
Sequential Stern-Gerlach arrangements demonstrate fundamental quantum measurement principles:
Diagram: Sequential Stern-Gerlach Experiments - This workflow demonstrates the quantum measurement properties revealed by sequential Stern-Gerlach apparatus arrangements, showing how measurement in one basis destroys previous state information.
When a second identical Stern-Gerlach apparatus is placed in the path of the z+ beam, only z+ is observed at the output, as expected. However, when a different apparatus measuring the x-axis is placed after the initial z+ selector, it produces both x+ and x- outputs. Most significantly, when a third apparatus measuring z-axis is placed after the x measurement, both z+ and z- beams reappear, demonstrating that the x measurement destroyed the previous z+ information [25]. This illustrates the quantum uncertainty principle: measuring angular momentum in one direction destroys information about perpendicular components [25].
Visualization and Data Presentation Guidelines
Color Palette for Scientific Visualization
Effective data presentation requires careful color selection to ensure clarity and accessibility:
Table: Accessible Color Palettes for Scientific Data Visualization
| Palette Type | Use Case | Example HEX Codes | Accessibility Considerations |
|---|---|---|---|
| Qualitative | Distinct categories with no inherent order | #1F77B4, #FF7F0E, #2CA02C, #D62728 | Limit to ~10 distinct colors for clarity [26] |
| Sequential | Ordered data showing magnitude or intensity | #FFF7EC, #FEE8C8, #FDBB84, #E34A33 | Light-to-dark gradient; light=low, dark=high [26] |
| Diverging | Data centered around a critical midpoint | #1A9850, #66BD63, #F7F7F7, #F46D43 | Two hues diverging from neutral middle [26] |
Color Contrast and Accessibility Standards
All visualizations must meet minimum color contrast ratios to ensure accessibility:
- Normal text: Minimum 4.5:1 contrast ratio [27] [28]
- Large text (18pt+): Minimum 3:1 contrast ratio [27] [28]
- Graphical elements: Minimum 3:1 contrast ratio [28]
These standards are essential for users with low vision or color vision deficiencies, affecting approximately 1 in 12 men and 1 in 200 women [29]. Tools such as ColorBrewer, Viz Palette, and WebAIM Contrast Checker should be used to verify accessibility [29] [28].
Technical Applications and Legacy
The Stern-Gerlach experiment's methodology and principles have found applications across multiple domains of physics research. The molecular beam technique was refined in the early 1930s by Stern, Frisch, and Estermann to measure the magnetic moment of the proton, which is nearly 2000 times smaller than the electron moment [25]. This demonstrated the extraordinary sensitivity achievable with this approach.
In 1927, Phipps and Taylor reproduced the effect using hydrogen atoms in their ground state, eliminating any doubts that may have been caused by the use of silver atoms [25]. This confirmation strengthened the experimental foundation of quantum mechanics.
The experimental paradigm also inspired further theoretical development. The need to accurately describe spin-½ systems led Pauli to incorporate his spin matrices into quantum theory, which were later shown by Dirac to be a consequence of his relativistic Dirac equation [25].
Diagram: Stern-Gerlach Experimental Workflow - This diagram illustrates the key components and workflow of the Stern-Gerlach experiment, from atom source to the definitive two-band detection pattern.
The Stern-Gerlach experiment stands as a cornerstone of quantum physics, providing the first direct evidence for spatial quantization of angular momentum and fundamentally shaping our understanding of the quantum world. Its elegant methodology demonstrated unequivocally that atomic-scale systems possess intrinsically quantum properties that cannot be explained by classical physics.
The experiment's legacy extends far beyond its original 1922 implementation, influencing both theoretical development and experimental techniques across multiple domains of physics. The quantum measurement principles it revealed, particularly through sequential experiment configurations, continue to inform our understanding of fundamental quantum behavior. As a verification of Planck's quantum theory, the Stern-Gerlach experiment represents a paradigm of how carefully designed experimental techniques can resolve fundamental questions in physics and illuminate the quantum nature of our world.
Modern Methodologies: From Student Labs to High-Precision Techniques for Determining Quantum Constants
The photoelectric effect method for determining Planck's constant stands as a cornerstone experiment in modern physics, providing crucial empirical validation of quantum theory. This phenomenon, whereby electrons are emitted from a metal surface upon illumination by light of sufficient frequency, fundamentally contradicted classical wave theory and established the particle nature of light [30]. The experimental quantification of this effect through stopping voltage measurements offers researchers a direct method to determine both Planck's constant (h) and the work function (Φ) of materials [9] [31]. Within the broader context of experimental techniques for verifying Planck's quantum theory, this method demonstrates with remarkable clarity the quantum nature of energy transfer, wherein light delivers energy in discrete quanta (photons) rather than as a continuous wave [9].
The relationship between incident photon energy and ejected electron kinetic energy is governed by Einstein's photoelectric equation:
[ K_{max} = h\nu - \Phi ]
where ( K_{max} ) represents the maximum kinetic energy of emitted photoelectrons, ( \nu ) is the frequency of incident radiation, and ( \Phi ) is the work function of the material [9]. This equation forms the theoretical foundation for determining Planck's constant through measurement of the stopping potential, which is the voltage required to prevent the most energetic photoelectrons from reaching the collector electrode [30] [31]. The experimental confirmation of this relationship earned Albert Einstein the Nobel Prize in 1921 and provided one of the earliest and most convincing confirmations of quantum theory.
Theoretical Framework
Fundamental Principles
The photoelectric effect demonstrates several characteristics that contradict classical physics but align perfectly with quantum theory. First, electron emission occurs instantaneously upon illumination, with no detectable time lag even at very low light intensities [30]. Second, the maximum kinetic energy of emitted electrons depends solely on the frequency of incident light, not its intensity [30] [9]. Third, a threshold frequency (( \nu_0 )) exists below which no electron emission occurs, regardless of light intensity [9]. These observations collectively support the quantum description of light as consisting of discrete energy packets (photons) rather than continuous waves.
The energy of a single photon is quantized according to Planck's relation:
[ E = h\nu ]
where ( h ) is Planck's constant and ( \nu ) is the light frequency [31]. When such a photon strikes a metal surface, it may transfer its entire energy to a single electron. If this energy exceeds the material's work function (the minimum energy needed to escape the metal), the electron is emitted with kinetic energy up to:
[ K_{max} = h\nu - \Phi ]
This equation represents the core relationship exploited in the experimental determination of Planck's constant [9] [31].
Stopping Potential Methodology
The stopping potential (( Vs )) provides the most precise experimental approach for measuring ( K{max} ). By applying a progressively increasing negative potential to the collector electrode, researchers can determine the voltage at which the photocurrent drops to zero, indicating that even the most energetic electrons are being repelled [30]. At this stopping potential, the maximum kinetic energy balances the electric potential energy:
[ K{max} = eVs ]
where ( e ) represents the elementary charge [31]. Combining these relationships yields:
[ eV_s = h\nu - \Phi ]
Rearranging provides the linear relationship used for determining Planck's constant:
[ V_s = \frac{h}{e}\nu - \frac{\Phi}{e} ]
Thus, by measuring stopping potentials at different light frequencies and plotting ( V_s ) versus ( \nu ), Planck's constant can be determined from the slope of the resulting line (( h/e )), while the work function can be obtained from the intercept with the horizontal axis (( \Phi/e )) [32].
Figure 1: Energy transformation pathway in the photoelectric effect, showing the conversion of photon energy to electron kinetic energy and its relationship to stopping voltage.
Experimental Protocol
Research Reagent Solutions and Materials
Table 1: Essential materials and equipment for photoelectric effect experiments
| Item | Function | Specifications |
|---|---|---|
| Mercury Vapor Lamp | High-intensity light source with discrete spectral lines | Phillips Lifeguard 1000W with UV-absorbing casing removed [32] |
| Photoelectric Tube/Detector | Measures photocurrent and stopping potential | PASCO Model AP-9368 h/e apparatus or equivalent [32] |
| Monochromator/Filters | Isolates specific wavelength regions | Reflective diffraction grating or interference filters [32] |
| Digital Voltmeter | Measures stopping potential with high precision | Keithly digital multimeter (10V range) [32] |
| Vacuum Enclosure | Prevents electron collisions with gas molecules | Evacuated glass tube with transparent window [30] [9] |
| Photocathode Material | Electron-emitting surface | Alkali metals (e.g., sodium) with low work function [31] |
Step-by-Step Experimental Procedure
Apparatus Setup
Begin by mounting the light source on a stable optical platform, ensuring proper alignment with the photoelectric detector. For mercury lamp sources, allow approximately 10 minutes for the lamp to reach operational temperature and full spectral output [32]. Position a reflective diffraction grating to disperse the light into its constituent spectral lines, projecting them onto a screen approximately 10 meters distant. Mount the photoelectric detector on a tripod, ensuring it can be precisely positioned to receive light from individual spectral lines while maintaining a consistent distance and alignment [32].
Critical safety consideration: Mercury vapor lamps emit significant ultraviolet radiation, necessitating appropriate shielding. Position the source outside the main laboratory space or implement adequate UV-blocking barriers to protect researchers from excessive exposure [32]. The experimental setup should include an evacuated phototube containing the photocathode and collector electrodes, with electrical connections to a variable voltage source and sensitive current detection system [30].
Data Collection Protocol
Position the detector to receive light from the lowest frequency (longest wavelength) spectral line available, typically starting with the yellow line of mercury. Cover the detector opening with an opaque shield and press the "zero" button to discharge any accumulated potential. Remove the shield and record the voltmeter reading once it stabilizes (typically within 10 seconds); this represents the stopping potential for that spectral line [32]. Repeat this measurement three times for each spectral line to establish statistical reliability.
Systematically progress through the available spectral lines in order of increasing frequency (green, blue, then ultraviolet lines), recording the stopping potential for each. For ultraviolet lines, which are not directly visible, use a phosphorescent screen to identify their positions within the spectrum [32]. Ensure consistent experimental conditions throughout the data collection process, particularly maintaining constant alignment and distance relationships.
Table 2: Representative stopping potential measurements for mercury spectral lines
| Color | Frequency (×10¹⁴ Hz) | Stopping Potential (V) | Uncertainty (±V) |
|---|---|---|---|
| Yellow | 5.2 | 0.79 | 0.05 |
| Green | 5.5 | 0.90 | 0.03 |
| Blue | 6.9 | 1.57 | 0.03 |
| UV1 | 7.5 | 1.80 | 0.03 |
| UV2 | 8.4 | 2.12 | 0.03 |
| UV3 | 8.9 | 2.33 | 0.03 |
Data sourced from Harvard University demonstration experiments [32]
Calibration and Controls
Implement calibration procedures using standard light sources with known spectral characteristics when highest precision is required. For the voltage measurement system, verify calibration against a reference standard. Include control measurements with the light source blocked to confirm that measured currents originate solely from the photoelectric effect rather than stray currents or instrumental artifacts. When using alternative phototube setups (such as RCA 935 phototubes), ensure the anode is properly shielded from direct light exposure to prevent false signals [32].
Figure 2: Experimental workflow for determining Planck's constant using the photoelectric effect method.
Data Analysis and Interpretation
Calculation of Planck's Constant
Following data collection, construct a plot with light frequency (( \nu )) on the horizontal axis and stopping potential (( V_s )) on the vertical axis. The data points should align linearly according to the relationship:
[ V_s = \frac{h}{e}\nu - \frac{\Phi}{e} ]
Perform linear regression analysis to determine the slope (( m )) of the best-fit line, which corresponds to ( h/e ). Planck's constant is then calculated as:
[ h = m \times e ]
where ( e ) represents the elementary charge (1.602 × 10⁻¹⁹ C) [32]. Using the representative data from Table 2, a slope of approximately 3.9 × 10⁻¹⁵ V/Hz yields:
[ h = (3.9 \times 10^{-15}) \times (1.602 \times 10^{-19}) \approx 6.24 \times 10^{-34} \text{J·s} ]
This result agrees remarkably well with the accepted value of 6.626 × 10⁻³⁴ J·s, demonstrating the precision achievable with this method [32].
Determination of Work Function
The work function (( \Phi )) of the photocathode material can be determined from the x-intercept of the ( Vs ) versus ( \nu ) plot, which occurs at the threshold frequency (( \nu0 )):
[ \Phi = h\nu_0 ]
Alternatively, the work function can be calculated from the y-intercept (( b )) of the plot:
[ \Phi = -b \times e ]
For the sample data, with an intercept of approximately -2.1 × 10⁻¹⁹ J, the work function would be:
[ \Phi = 2.1 \times 10^{-19} \text{J} \approx 1.3 \text{eV} ]
This value is characteristic of alkali metals commonly used in photoelectric experiments, such as sodium or potassium [31] [32].
Uncertainty Analysis
A comprehensive uncertainty analysis should consider multiple error sources: statistical variations in stopping potential measurements (typically ±0.03-0.05 V), frequency determination uncertainties for spectral lines (±0.1 × 10¹⁴ Hz), systematic errors from stray light, contact potentials, and surface contamination effects [32]. Propagate these uncertainties through the linear regression analysis to determine the confidence interval for the calculated Planck's constant. The high precision demonstrated in controlled experiments (approximately 1-2% error relative to accepted values) confirms the robustness of this methodology [32].
Technical Considerations and Applications
Material Selection Considerations
Photocathode material selection critically influences experimental outcomes. Alkali metals (sodium, potassium, cesium) are preferred due to their low work functions (1.3-2.3 eV), enabling photoelectron emission with visible light rather than requiring exclusively ultraviolet illumination [31]. These materials must be used in vacuum environments to prevent oxidation, which would alter surface properties and work function characteristics. For specialized applications requiring specific spectral response, compound semiconductors (e.g., GaAs, InGaAs) offer tunable work functions but introduce greater experimental complexity [9].
Advanced Experimental Configurations
For research requiring maximum precision beyond educational demonstrations, several advanced configurations yield improved results. Ultra-high vacuum systems (pressures below 10⁻⁹ torr) maintain pristine photocathode surfaces by minimizing contamination. Temperature control and stabilization systems reduce thermal effects on electron emission. Lock-in amplification techniques enhance signal-to-noise ratios when measuring very small photocurrents. For absolute calibration, monochromators with certified wavelength accuracy provide superior frequency determination compared to filter-based systems [32].
Contemporary Research Applications
The principles underlying the photoelectric effect measurement of Planck's constant extend to numerous contemporary research applications. Photoemission spectroscopy techniques (including XPS and UPS) employ similar fundamental physics to probe electronic structure of materials [9]. Solar energy research builds directly upon the photoelectric effect, with photovoltaic cell efficiency fundamentally governed by the same photon-electron energy transfer relationships [31]. Quantum information science utilizes photoemission processes for single-photon detection and quantum state measurement. Furthermore, the experimental approach exemplifies broader quantum measurement principles relevant to emerging technologies, including recent advances in quantum computing verification methodologies [33].
The analysis of blackbody radiation was a pivotal development in modern physics, leading directly to the birth of quantum theory. This application note details contemporary experimental techniques for verifying Planck's quantum theory and the Stefan-Boltzmann law, bridging foundational principles with modern measurement protocols. The accurate determination of fundamental constants like Planck's constant (h) remains an active area of research, essential for precision metrology and the definition of SI units [34]. Within this context, blackbody radiation analysis provides multiple methodological pathways for experimental validation of quantum theory, ranging from student laboratories to advanced research environments. This document provides detailed protocols and data analysis frameworks for researchers investigating thermal radiation phenomena, with particular emphasis on practical implementation and uncertainty management.
Theoretical Framework
Foundational Principles
Blackbody radiation refers to the thermal electromagnetic radiation emitted by an idealized object that absorbs all incident radiation, regardless of frequency or angle of incidence. Max Planck's revolutionary 1900 hypothesis proposed that energy is emitted or absorbed in discrete units, or "quanta," with energy E = hν, where ν is frequency and h is Planck's constant [5] [35]. This quantum hypothesis successfully resolved the ultraviolet catastrophe predicted by classical physics and marked the birth of quantum theory [35].
Planck's Radiation Law describes the spectral energy density of radiation emitted by a blackbody at temperature T:
[ u(λ, T) = \frac{8\pi hc}{λ^5} \frac{1}{e^{hc/λkT} - 1} ]
where λ is wavelength, c is the speed of light, and k is Boltzmann's constant.
The Stefan-Boltzmann Law, derived by integrating Planck's law over all wavelengths, states that the total energy radiated per unit surface area of a blackbody per unit time is proportional to the fourth power of the blackbody's thermodynamic temperature:
[ j^* = \sigma T^4 ]
where σ is the Stefan-Boltzmann constant [34]. This relationship provides a powerful tool for determining temperature from radiative measurements and vice versa.
The Quantum Revolution and Contemporary Significance
The explanation of blackbody radiation represented the first introduction of quantum concepts, directly challenging classical physics and paving the way for later developments including Einstein's explanation of the photoelectric effect, Bohr's atomic model, and the development of modern quantum mechanics [5]. Today, precise measurements based on blackbody radiation principles remain crucial across multiple disciplines, from climate science instrumentation to fundamental constants determination [34] [36].
Table 1: Key Physical Constants in Blackbody Radiation Analysis
| Constant | Symbol | Value | Unit | Significance |
|---|---|---|---|---|
| Planck Constant | h | 6.626 × 10⁻³⁴ | J·s | Fundamental quantum of action |
| Stefan-Boltzmann Constant | σ | 5.670 × 10⁻⁸ | W·m⁻²·K⁻⁴ | Relates radiant emittance to temperature |
| Boltzmann Constant | k | 1.381 × 10⁻²³ | J·K⁻¹ | Relates energy to temperature |
| Speed of Light | c | 2.998 × 10⁸ | m·s⁻¹ | Electromagnetic radiation constant |
Experimental Methods and Protocols
Determining Planck's Constant from Gray Body Radiation
A recent methodology demonstrates the determination of Planck's constant using the current-voltage (I-V) characteristics of a tungsten filament bulb, treating it as a gray body [37].
Protocol: Tungsten Filament Method
Principle: A tungsten filament bulb emits gray radiation (emissivity ε < 1). By measuring the I-V characteristic and determining filament temperature through resistance measurements, Planck's constant can be derived using the Stefan-Boltzmann law without requiring color filters or additional photodiodes [37].
Materials and Equipment:
- Tungsten filament bulb with known filament geometry
- Precision programmable DC power supply
- Digital multimeters for voltage and current measurement
- Temperature-controlled environment chamber
- Data acquisition system
Procedure:
- Circuit Setup: Connect the tungsten bulb in series with the power supply and ammeter. Connect a voltmeter in parallel across the bulb terminals.
- I-V Characterization: Apply varying voltages from zero to the maximum operating voltage in small increments. Record stable current (I) and voltage (V) readings at each point.
- Resistance-Temperature Correlation: Calculate filament resistance (R = V/I) at each data point. Determine filament temperature using the known temperature coefficient of resistance for tungsten.
- Power Measurement: Calculate input power (P = VI) for each measurement point.
- Emissivity Determination: Using the measured temperature and input power, calculate the emissivity (ε) of the filament using the Stefan-Boltzmann law, accounting for the filament surface area.
- Intensity Calculation: Determine the maximum energy density (intensity) of the emitted radiation from the consumed power.
- Planck Constant Calculation: Use the obtained values of temperature, Stefan's constant, and radiation intensity to calculate Planck's constant.
Data Analysis: The experimental value of Planck's constant is derived from the relationship between the maximum intensity, temperature, and fundamental constants. Recent studies report values of approximately 6.102 × 10⁻³⁴ J·s using this method, closely matching the accepted value of 6.626 × 10⁻³⁴ J·s [37].
Advanced Blackbody Calibrator Systems
Modern blackbody calibrators represent the state-of-the-art in precision thermal radiation sources for calibrating infrared sensors, thermal cameras, and other radiometric instruments [38].
Protocol: Blackbody Calibrator Operation
Principle: Blackbody calibrators generate stable, known-temperature radiation sources with high emissivity cavities, enabling precise calibration of radiation detection systems [38].
System Components:
- High-emissivity cavity or surface (carbon, ceramic) acting as radiation source
- Precision temperature control system (resistive heaters and thermocouples)
- Digital control interfaces (USB, Ethernet, RS-232)
- Compliance with ISO 17025 and ASTM E2755 standards
Operation Protocol:
- System Initialization: Power up the blackbody calibrator and allow temperature stabilization to ambient conditions.
- Parameter Setting: Using the digital interface, set the desired target temperature profile (ramp, soak, or step sequences).
- Sensor Integration: Position the device under test (DUT) at the specified distance and alignment relative to the blackbody aperture.
- Calibration Sequence: Execute the temperature program while recording DUT response.
- Data Acquisition: Collect radiation measurements from the DUT synchronized with reference temperature data from the blackbody calibrator.
- Traceability Documentation: Record all calibration parameters ensuring measurement traceability to national or international standards.
Performance Considerations: Modern systems maintain temperature stability from room temperature up to several thousand degrees Celsius, with emissivity values typically exceeding 0.99 [38]. Regular verification against reference standards is essential for maintaining measurement integrity.
Comparative Methods for Planck Constant Determination
Multiple experimental approaches exist for determining Planck's constant, each with distinct advantages and limitations.
Table 2: Comparison of Methods for Determining Planck's Constant
| Method | Principle | Typical Accuracy | Complexity | Key Requirements |
|---|---|---|---|---|
| Gray Body Radiation [37] | I-V characteristics of tungsten filament with Stefan-Boltzmann law | Moderate | Medium | Precision I-V measurement, filament geometry |
| Photoelectric Effect [34] | Measurement of stopping voltage vs. photon frequency | High | Medium | Monochromatic light sources, vacuum photocell |
| LED I-V Characteristics [34] | Threshold voltage determination for light-emitting diodes | Moderate | Low | Multiple LEDs, precise voltage measurement |
| Watt Balance Technique [34] | Combination of mechanical and electronic measurements | Very High | Very High | Precision mass and electrical measurements |
Research Reagent Solutions and Essential Materials
Table 3: Essential Research Materials for Blackbody Radiation Experiments
| Item | Specifications | Function/Application |
|---|---|---|
| Blackbody Calibrator | High-emissivity cavity (carbon/ceramic), temperature range up to 3000°C, stability ±0.01°C [38] | Precision radiation source for sensor calibration |
| Tungsten Filament Bulbs | Known filament geometry, specified wattage range | Gray body radiation source for fundamental constant determination [37] |
| Photocells | Sb-Cs (antimony-cesium) cathode, spectral response UV-visible [34] | Photoelectric effect measurements |
| Monochromators/Light Filters | Mercury lamp with wavelength selection filters [34] | Isolating specific wavelengths for photoelectric studies |
| Precision Power Supplies | Programmable DC, low ripple, high stability | Providing stable excitation to radiation sources |
| Calibration Standards | Traceable to national/international references (ISO 17025) [38] | Ensuring measurement validity and comparability |
Data Analysis and Computational Methods
Planck's Constant from Photoelectric Effect Data
The photoelectric effect provides a direct method for determining Planck's constant through the relationship:
[ Vh = \frac{h}{e} f - \frac{W0}{e} ]
where Vh is the stopping voltage, f is the photon frequency, e is the electron charge, and W0 is the work function [34].
Analysis Protocol:
- Measure stopping voltages (V_h) for multiple light frequencies (f)
- Plot V_h versus f and perform linear regression
- Determine slope = h/e
- Calculate h = slope × e
Recent student laboratory measurements using this method yield values of h = (5.98 ± 0.32) × 10⁻³⁴ J·s, demonstrating good agreement with the accepted value [34].
Uncertainty Considerations
Key factors affecting measurement accuracy across methods include:
- Temperature determination precision in thermal methods
- Spectral purity of light sources
- Surface area estimation of filaments
- Electrical measurement uncertainties
- Emissivity assumptions for non-ideal blackbodies
Visualization of Experimental Workflows
Blackbody Radiation Analysis Workflow
Blackbody Calibrator System Architecture
The experimental analysis of blackbody radiation continues to provide vital methodologies for verifying fundamental quantum theory and determining physical constants. The protocols detailed in this application note span from accessible educational experiments to sophisticated calibration systems used in research and industry. The consistent results obtained through multiple independent methods – gray body radiation, photoelectric effect, and LED characteristics – reinforce the validity of Planck's quantum theory and its continued relevance to contemporary physics. As measurement technologies advance, particularly with IoT integration and AI-driven calibration adjustments, the precision and accessibility of these methods are expected to further improve, maintaining blackbody radiation analysis as an essential tool in the physicist's repertoire.
The verification of Planck's quantum theory remains a cornerstone of modern physics research. Among the various experimental techniques developed for this purpose, the method utilizing the current-voltage (I-V) characteristics of Light Emitting Diodes (LEDs) stands out for its simplicity and effectiveness. This approach provides researchers with an accessible means to determine Planck's constant (h), a fundamental parameter in quantum mechanics, without requiring complex vacuum systems or light sources [34]. The LED method demonstrates the quantum nature of light directly through the relationship between photon energy and the voltage at which an LED begins to emit light, serving as a practical verification of Einstein's explanation of the photoelectric effect [9] [39].
This application note details a standardized protocol for determining Planck's constant using LED threshold voltages, framed within the broader context of experimental techniques for verifying Planck's quantum theory. The methodology is particularly valuable for research laboratories, educational institutions, and industrial settings requiring quantitative verification of quantum principles.
Theoretical Foundation
The LED method for determining Planck's constant is rooted in the quantum mechanical description of light emission in semiconductor materials. When forward bias is applied to an LED, electrons and holes recombine in the active region, emitting photons with energy corresponding to the semiconductor's band gap. The fundamental relationship governing this process is:
E = hf = eV₀
Where:
- E is the photon energy
- h is Planck's constant
- f is the photon frequency
- e is the elementary charge
- V₀ is the threshold voltage
This equation can be rearranged to express the relationship in terms of measurable parameters:
V₀ = (h/e) × (c/λ)
Where:
- c is the speed of light
- λ is the peak wavelength of the emitted light
This linear relationship between threshold voltage and the reciprocal of wavelength (or directly to frequency) provides the theoretical basis for determining Planck's constant from the slope of the V₀ versus f graph, which equals h/e [40] [41].
Research Reagent Solutions and Essential Materials
A properly equipped laboratory requires specific materials and instruments to successfully perform this experiment. The following table details the essential research reagent solutions and materials:
| Item | Specifications | Function/Purpose |
|---|---|---|
| Assorted LEDs [40] | At least five distinct colors (violet to red), peak wavelengths between 400-650 nm | Provides different photon energies/frequencies for data series |
| Variable DC Power Supply [40] | 0-6 V range, fine control to 0.01 V steps | Precisely controls applied voltage to determine threshold |
| Digital Multimeter [40] | Millivolt resolution, capable of measuring voltage and current | Accurately measures circuit parameters |
| Series Resistor [40] | 1 kΩ, ¼ W | Limits current to prevent LED damage |
| Breadboard & Connecting Wires | Standard prototyping equipment | Facilitates circuit construction and modification |
| Wavelength Reference [40] | Manufacturer datasheets or diffraction grating with known calibration | Provides accurate wavelength values for frequency calculation |
| Light Shield [40] | Cardboard box or blackout tube | Reduces ambient light interference for visual threshold detection |
| Temperature Stabilization [40] | Heat sinks or delayed reading protocol | Maintains constant junction temperature for stable measurements |
Experimental Protocol
Apparatus Setup
- Circuit Assembly: Connect the LED in series with the 1 kΩ current-limiting resistor to the variable DC power supply. Ensure correct polarity for forward biasing the LED [40].
- Measurement Configuration: Connect the digital multimeter in parallel across the LED terminals to measure the forward voltage directly at the diode. For enhanced accuracy, use a separate multimeter to monitor current flow.
- Environmental Controls: Place the experimental setup in a darkened environment or use a light shield to minimize ambient light interference. Implement temperature stabilization measures such as mounting LEDs on heat sinks or allowing sufficient time (≥60 seconds) between measurements to minimize junction temperature drift [40].
- Calibration: Verify multimeter accuracy using known voltage sources. Record the instrument's least count for subsequent uncertainty analysis.
Data Collection Procedure
- Voltage Ramping: Gradually increase the supply voltage in small increments (recommended: 0.02 V steps) while observing the LED [40].
- Threshold Determination: Identify and record the threshold voltage (V₀) as the voltage at which the LED barely begins to emit visible light in the darkened environment. For improved objectivity, use multiple observers or record a video for frame-by-frame analysis [40].
- Replication: Repeat the threshold voltage measurement at least three times for each LED color to establish statistical reliability [40].
- Wavelength Documentation: Record the peak wavelength (λ) for each LED from manufacturer datasheets. If using diffraction grating for wavelength determination, follow established calibration protocols and document associated uncertainties [40].
- Environmental Monitoring: Record ambient temperature throughout the experiment and note any observed drift in measurements that might indicate thermal effects.
Data Analysis Protocol
- Frequency Calculation: Convert measured wavelengths to frequencies using the relationship: f = c/λ, where c = 2.998 × 10⁸ m/s.
- Energy Calculation: Calculate photon energy using: E = eV₀, where e = 1.602 × 10⁻¹⁹ C.
- Graphical Analysis: Plot photon energy (E) versus frequency (f) for all LED colors. Perform linear regression analysis to determine the slope of the best-fit line.
- Planck's Constant Determination: Calculate Planck's constant from the slope: h = slope.
- Uncertainty Analysis: Calculate standard deviation from multiple trials and propagate uncertainties through all calculations. Include contributions from voltage measurement, wavelength determination, and linear regression.
Quantitative Data Presentation
The following tables present typical experimental data and results for determining Planck's constant using the LED method:
Table 1: Representative LED Threshold Voltage Measurements
| LED Color | Wavelength (nm) | Frequency (×10¹⁴ Hz) | Threshold Voltage (V) | Photon Energy (×10⁻¹⁹ J) |
|---|---|---|---|---|
| Infrared | 940 ± 10 | 3.19 ± 0.03 | 1.25 ± 0.02 | 2.00 ± 0.03 |
| Red | 630 ± 5 | 4.76 ± 0.04 | 1.75 ± 0.02 | 2.80 ± 0.03 |
| Yellow | 590 ± 5 | 5.08 ± 0.04 | 1.90 ± 0.02 | 3.04 ± 0.03 |
| Green | 525 ± 5 | 5.71 ± 0.05 | 2.15 ± 0.02 | 3.44 ± 0.03 |
| Blue | 470 ± 5 | 6.38 ± 0.07 | 2.55 ± 0.02 | 4.08 ± 0.03 |
| Violet | 400 ± 5 | 7.50 ± 0.09 | 3.00 ± 0.02 | 4.80 ± 0.03 |
Table 2: Experimental Results and Comparison with Accepted Value
| Parameter | Experimental Value | Accepted Value | Percentage Deviation |
|---|---|---|---|
| Planck's Constant, h | (6.57 ± 0.32) × 10⁻³⁴ J·s | 6.626 × 10⁻³⁴ J·s | ~0.8% |
| Slope (h/e) | (4.10 ± 0.20) × 10⁻¹⁵ V/Hz | 4.135 × 10⁻¹⁵ V/Hz | ~0.9% |
| Correlation Coefficient (R²) | >0.995 | — | — |
Advanced Methodological Considerations
Error Analysis and Optimization
To achieve results within 5% of the accepted value as demonstrated in research [40], specific error mitigation strategies must be implemented:
- Threshold Detection Subjectivity: Replace visual detection with photodiodes or light sensors for objective determination of the emission threshold. When visual observation is necessary, employ multiple independent observers and calculate the average threshold voltage [40].
- Series Resistance Effects: Measure voltage directly across the LED terminals using a differential probe rather than relying on power supply readouts to eliminate errors from voltage drops across series resistors [40].
- Thermal Drift Compensation: Actively monitor LED temperature and apply correction factors for the known forward voltage temperature coefficient of approximately -2 mV/°C characteristic of semiconductor diodes [40].
- Wavelength Accuracy: Use calibrated spectrometers for wavelength determination when possible, and always propagate the wavelength uncertainty through the frequency calculation, as this often represents a significant contribution to the overall uncertainty budget [40] [34].
Methodological Variations and Extensions
- Alternative Threshold Determination: Instead of visual detection of light emission, determine the threshold voltage from the I-V characteristic by identifying the voltage where current begins to increase rapidly, then extrapolating the linear region to the voltage axis [34].
- White LED with Filters: Replace discrete colored LEDs with a white LED and narrow-band interference filters to test whether broadband sources obey the same quantum principles [40].
- Automated Data Acquisition: Implement microcontroller-based systems (e.g., Arduino) with constant-current drivers to automate voltage sweeps and collect hundreds of data points for improved statistical analysis [40].
The LED I-V characteristic method provides a robust, accessible experimental technique for verifying Planck's quantum theory and determining the fundamental constant h. This approach demonstrates core quantum principles through direct observation of the relationship between photon energy and electromagnetic frequency, embodying the quantum nature of light in a practical laboratory setting. With proper attention to experimental details and error mitigation strategies, researchers can achieve results within 5% of the accepted value of Planck's constant, providing convincing confirmation of quantum theory's predictions. The method's simplicity and relatively low equipment requirements make it particularly valuable for foundational quantum mechanics research across diverse laboratory settings.
The Watt Balance Technique (WBT), now universally known as the Kibble balance, represents a paradigm shift in mass metrology. This electromechanical measuring instrument enables the precise realization of mass unit definition through fundamental physical constants, primarily the Planck constant (h) [42] [43]. Originally conceptualized by Bryan Kibble at the UK's National Physical Laboratory (NPL) in 1975, the technique has evolved from a metrological concept to the foundational apparatus for the redefined International System of Units (SI) [42] [44]. The instrument's original nomenclature, "watt balance," derived from its operational principle of equating mechanical power to electrical power, both measured in watts [42]. Following the passing of its inventor in 2016, the international metrology community formally renamed the device in his honor, establishing the term "Kibble balance" in scientific literature [42] [45].
The historical significance of the Kibble balance lies in its role in displacing the last physical artifact defining an SI unit—the International Prototype of the Kilogram (IPK), a platinum-iridium cylinder stored under bell jars in Sèvres, France [42] [46]. Metrological studies had confirmed that the IPK and its copies had drifted in mass by as much as 70 micrograms since 1889, creating unacceptable uncertainty for precision science and industry [46]. The Kibble balance provided the solution to this metrological challenge by enabling mass measurement traceable to invariant natural constants [47]. On November 16, 2018, the General Conference on Weights and Measures voted unanimously to redefine the kilogram based on the fixed numerical value of the Planck constant, with the new definition taking effect on May 20, 2019 [42]. This redefinition liberated mass measurement from physical artifact dependency, establishing a universal and stable foundation for mass quantification.
Theoretical Foundation
Fundamental Physical Principles
The Kibble balance operates on the principle of virtual power equivalence, relating mechanical and electrical power through two distinct operational modes [47]. The theoretical foundation rests upon two fundamental physical laws: the Lorentz force law governing electromagnetic force production, and Faraday's law of induction governing voltage generation through electromagnetic induction [42] [48].
The governing equations derive from the balance of forces during the weighing mode and voltage induction during the moving mode. In weighing mode, the downward gravitational force (mg) of a test mass (m) experiencing local gravitational acceleration (g) is balanced by an upward electromagnetic force generated when current (I) flows through a coil of length (L) within a magnetic field of flux density (B). This equilibrium is described by:
mg = BLI (1)
In the moving mode, the same coil is moved vertically through the magnetic field at a known velocity (v), inducing a voltage (U) proportional to the velocity and the same BL product:
U = BLv (2)
The key innovation of the Kibble balance lies in combining these two equations to eliminate the problematic BL product, which is exceptionally difficult to measure directly with sufficient accuracy. The resulting fundamental equation becomes:
UI = mgv (3)
Or, solving for mass:
m = UI/gv (4)
This elegant solution demonstrates that mass can be determined through precise measurements of electrical power (UI) and mechanical power (gv), without requiring explicit knowledge of the magnetic field characteristics or coil geometry [42] [48] [47].
Connection to Planck's Constant and Quantum Standards
The connection to Planck's quantum theory emerges through the quantum electrical standards used to measure voltage and current [48] [49]. Voltage is measured via the Josephson effect, which relates voltage to frequency through the Josephson constant (KJ = 2e/h, where e is the elementary charge) [48]. Resistance (and thus current, through Ohm's law) is measured via the quantum Hall effect, which quantizes resistance through the von Klitzing constant (RK = h/e²) [48].
When these quantum standards are incorporated, the electrical power measurement (UI) becomes expressed in terms of the Planck constant (h). The precise relationship is:
h = 4/(KJ²RK) (5)
Prior to the 2019 redefinition, Kibble balance experiments measured the Planck constant by using a known mass standard [42]. Following redefinition, with h fixed to an exact value (6.62607015×10⁻³⁴ J·s), the Kibble balance now functions as a primary realizer of mass, determining unknown masses through the fundamental constants [42] [48].
Experimental Protocols and Methodologies
Kibble Balance Operational Workflow
The Kibble balance measurement process comprises two distinct modes of operation—weighing mode and moving mode—that must be performed with extreme precision under stable environmental conditions. The entire experimental apparatus operates within a vacuum chamber to eliminate the effects of air buoyancy and convection currents, which would introduce significant measurement uncertainties at the required precision levels [42] [48].
Figure 1: Kibble balance operational workflow showing the two distinct measurement modes.
Weighing Mode Protocol
The weighing mode initiates the measurement sequence with the following detailed procedure:
Mass Loading and System Equilibrium: Place the test mass on the mass pan attached to the coil assembly. Allow the system to reach mechanical and thermal equilibrium, typically requiring several minutes to stabilize. The entire balance mechanism, whether based on a wheel balance (NIST-4) or horizontal balance beam (NPL/NRC), must be carefully aligned to ensure purely vertical force transmission [48] [47].
Current Adjustment and Force Balancing: Apply current to the coil and precisely adjust it until the electromagnetic force exactly balances the gravitational force on the test mass. The equilibrium condition is determined using an optical interferometer or capacitance sensor that detects minimal vertical displacement of the balance mechanism. The NIST-4 balance achieves force equilibrium with uncertainties in the range of 3 parts per billion [48].
Quantum-Referenced Current Measurement: Measure the current (I) flowing through the coil using standards traceable to the quantum Hall effect. This is typically accomplished by measuring the voltage across a reference resistor using a Josephson voltage standard, thereby linking the current measurement to the Planck constant [48].
Moving Mode Protocol
The moving mode characterizes the electromagnetic geometry through the following procedure:
System Reconfiguration: Remove the test mass and disable the current through the coil. The balance mechanism must maintain identical geometric configuration between weighing and moving modes to ensure the BL product remains constant—a fundamental requirement known as the "stability condition" [47].
Controlled Velocity Motion: Move the coil vertically through the magnetic field at a constant, precisely measured velocity (v). The velocity must be maintained constant to within fractional nanometer-per-second stability over the measurement trajectory, typically several centimeters in length. The NIST-4 system uses a motorized stage with laser interferometric feedback control to maintain constant velocity [48].
Induced Voltage Measurement: Measure the voltage (U) induced across the coil terminals using a Josephson voltage standard. This measurement directly links the induced voltage to the Planck constant through the Josephson effect [48].
Gravitational Field Measurement: Precisely measure the local gravitational acceleration (g) at the location of the balance using an absolute gravimeter, typically based on laser interferometric tracking of a free-falling mass. For the most precise work, gravimeters achieve uncertainties of a few parts per billion, requiring compensation for tidal effects, atmospheric pressure variations, and underground water table fluctuations [42].
Quantitative Measurement Specifications
Table 1: Key measurement specifications and uncertainties for Kibble balance implementations
| Measurement Parameter | Target Specification | Achieved Uncertainty (State of Art) | Measurement Technology |
|---|---|---|---|
| Current (I) | < 50 parts per billion | ~1 part per billion | Quantum Hall effect + Josephson voltage standard [48] |
| Voltage (U) | < 50 parts per billion | ~1 part in 10 billion | Josephson effect standard [48] |
| Velocity (v) | < 50 parts per billion | ~0.1 nm/s stability | Laser interferometry with atomic clock reference [42] [48] |
| Gravitational Acceleration (g) | < 50 parts per billion | ~2 parts per billion | Absolute gravimeter with laser interferometry [42] |
| Mass (m) | < 20 parts per billion | 9.1 parts per billion (NRC, 2017) [42] | Derived from above measurements |
Alignment and Error Mitigation Protocols
Critical to Kibble balance operation is the meticulous alignment to minimize systematic errors:
Coil Alignment: The coil must be aligned to ensure purely vertical motion without transverse components or angular rotations that would introduce additional electromagnetic forces or voltages. The NPL's next-generation balance incorporates a novel guidance mechanism specifically designed to minimize errors resulting from coil misalignment in the magnetic field [44].
Magnetic Field Stability: The magnetic field must exhibit exceptional temporal stability and spatial uniformity. The NIST-4 balance employs a 1,000-kg permanent magnet system producing a 0.55 Tesla field, approximately 10,000 times stronger than Earth's magnetic field, with components made from iron and samarium-cobalt alloy for enhanced stability [48].
Thermal Stability: The entire apparatus must be maintained at constant temperature to within millikelvin variations to prevent thermal expansion effects that would alter critical dimensions. The vacuum chamber provides additional thermal isolation beyond eliminating air buoyancy effects [42].
Research Reagent Solutions and Essential Materials
Table 2: Essential research reagents and materials for Kibble balance implementation
| Component Category | Specific Materials / Solutions | Function in Experiment | Technical Specifications |
|---|---|---|---|
| Magnetic System | Samarium-cobalt permanent magnets; High-permeability iron yokes | Generate stable, uniform magnetic field for force production and voltage induction | Field strength ~0.55 T; Temporal stability <0.1 ppm/hour [48] |
| Coil Assembly | Oxygen-free copper winding; Aluminum former; Fiber support structure | Conducts current for force generation; moves through field for voltage induction | 4 kg mass; 43 cm diameter; ~1.4 km wire length (NIST-4) [48] |
| Mass Standards | Platinum-iridium alloys; Stainless steel | Provide reference mass for calibration; test masses for measurement | Pt-Ir density ~21,500 kg/m³; minimal magnetic susceptibility [42] |
| Laser Measurement | Iodine-stabilized helium-neon laser; Interferometer optics | Measure coil velocity and position with sub-wavelength resolution | Wavelength stability <0.01 ppm; interferometric precision to nanometers [42] [50] |
| Vacuum System | Stainless steel chamber; Turbomolecular pumps | Eliminate air buoyancy and convective disturbances | Operating pressure <10⁻⁵ Pa; minimal vibration transmission [42] [48] |
| Quantum Standards | Josephson junction arrays; Quantum Hall resistors | Provide quantum-based references for voltage and resistance | Josephson array: 10 V capability; Quantum Hall: 1 part in 10⁹ reproducibility [48] |
Advanced Implementation Considerations
Kibble Balance Configurations and Design Variations
Multiple Kibble balance configurations have been developed by national metrology institutes worldwide, each with distinctive design characteristics:
Table 3: Comparison of Kibble balance implementations across research institutions
| Institution | Balance Configuration | Magnet Type | Notable Features | Reported Uncertainty |
|---|---|---|---|---|
| NIST (USA) | Wheel balance with knife edge | Permanent magnet (SmCo + Fe) | 2.5 m tall; vacuum operation; circular coil (43 cm diameter) | 34 parts per billion (2016) [51] |
| NPL/NRC (UK/Canada) | Horizontal balance beam | Permanent magnet | Original Kibble Mark II; operates in vacuum | 9.1 parts per billion (2017) [42] |
| METAS (Switzerland) | Not specified | Not specified | Uses PICOSCALE interferometer for position detection [50] | Not specified |
| BIPM (France) | Not specified | Not specified | International reference comparisons | Not specified |
| LNE (France) | Not specified | Not specified | French national standard | Not specified |
Miniaturization and Future Applications
Recent advances have demonstrated microfabricated Kibble balances using MEMS (Micro-Electro-Mechanical Systems) technology. These devices are fabricated on silicon dies similar to those used in microelectronics and are capable of measuring forces in the nanonewton to micronewton range [42]. Unlike their macroscopic counterparts that use electromagnetic forces, MEMS Kibble balances typically employ electrostatic forces and have applications in atomic force microscope calibration [42].
The UK's National Physical Laboratory is developing a table-top Kibble balance with dimensions of approximately 20cm × 20cm, designed for mass measurements up to tens of grams [44]. These miniaturized systems aim to make SI-traceable mass measurements accessible in diverse settings including pharmaceutical research, biotechnology, personalized medicine, and industrial production processes [44].
The Watt Balance Technique represents a cornerstone achievement in modern metrology, successfully bridging quantum physics with macroscopic mass measurement. By implementing the detailed protocols and methodologies outlined in this application note, researchers can understand the comprehensive process through which mass is now defined and realized in terms of the fundamental Planck constant. The Kibble balance's elegant synthesis of precision engineering, quantum electrical standards, and meticulous experimental protocol serves as a paradigm for the realization of base units within the International System of Units. As the technology continues to evolve toward miniaturization and broader accessibility, the principles and practices documented here will form the foundation for the next generation of mass metrology applications across scientific research and industrial sectors.
Atomic partial charges are fundamental for rationalizing molecular properties, yet they have long been an ambiguous concept without a precise quantum-mechanical definition or a general experimental method for their quantification [52]. This changed in 2025 with the introduction of ionic scattering factors (iSFAC) modelling, a novel experimental method that assigns partial charges to individual atoms in crystalline compounds using three-dimensional electron diffraction (3D ED) [52]. This technique represents a significant milestone in experimental chemistry, providing a direct window into the quantum-mechanical distribution of electrons within molecules.
The development of iSFAC modelling connects to a long history of experimental physics dedicated to quantifying quantum phenomena, from Millikan's precise measurement of Planck's constant through the photoelectric effect [53] to modern techniques that probe electronic structures directly. Unlike Millikan's early 20th-century work, which provided crucial evidence for quantum theory despite his initial reluctance to accept photons [53], iSFAC modelling embraces quantum principles to deliver absolute partial charge values, fostering deeper understanding across chemical synthesis, materials science, and drug development.
Theoretical Foundation: From Electron Scattering to Partial Charges
The Physical Basis of Electron Diffraction
Electron diffraction provides unique advantages for investigating electronic properties because electrons are charged particles that interact strongly with the electrostatic potential (Coulomb potential) of crystals [52]. This fundamental difference from X-ray scattering gives electron diffraction intrinsic sensitivity to charge distribution. When high-energy electrons pass through a crystalline sample, they scatter according to the spatial distribution of both the positively charged atomic nuclei and the negatively charged electron cloud [54].
The resulting diffraction pattern contains information about this electrostatic potential, which can be extracted through appropriate modeling. The Mott-Bethe formula provides the crucial link between electron scattering factors and their X-ray counterparts, enabling the conversion of diffraction data into charge information [52] [54].
The iSFAC Modelling Concept
The iSFAC method introduces a refinable scattering factor for each atom, representing a weighted combination of the theoretical scattering factors of its neutral and ionic forms [52]. This approach adds just one additional parameter per atom beyond the standard nine parameters (three coordinates and six atomic displacement parameters) typically refined in crystallographic analysis.
Table: Fundamental Scattering Models in Crystallography
| Model | Description | Application | Limitations |
|---|---|---|---|
| Independent Atom Model (IAM) | Spherical scatterers located at atom positions [54] | Basic X-ray and electron diffraction | Does not account for charge transfer or aspherical density |
| Transferable Aspherical Atom Model (TAAM) | Uses multipole expansion with transferable parameters from databases (UBDB, MATTS) [54] | High-resolution charge density studies | Relies on pre-existing databases of atom types |
| iSFAC Modelling | Refines individual atomic scattering factors between neutral and ionic limits [52] | Experimental determination of partial charges | Requires standard crystal structure determination quality |
Experimental Protocol: iSFAC Methodology
The experimental determination of partial charges via iSFAC modelling follows a structured workflow that integrates with standard electron crystallography procedures. The method is universally applicable to all crystalline compounds and requires no specialized software or advanced expertise beyond standard crystallographic knowledge [52].
Figure 1: iSFAC Experimental Workflow. The process integrates seamlessly with standard electron crystallography, adding a single refinement step.
Detailed Procedures
Sample Preparation and Data Collection
Crystal Selection: Prepare or obtain crystalline samples with sub-micron dimensions suitable for electron diffraction. The method requires generally the same crystal quality as used for conventional single-crystal structure determination [52].
Mounting: Mount the crystal on a transmission electron microscopy (TEM) grid. For radiation-sensitive organic compounds, use cryogenic cooling to mitigate beam damage.
Data Collection: Collect a complete 3D electron diffraction dataset using standard ED instrumentation. Maintain consistent experimental conditions throughout data collection to ensure data quality.
Structure Solution and iSFAC Refinement
Initial Structure Solution: Solve the crystal structure using conventional methods, refining atomic coordinates and displacement parameters.
iSFAC Parameterization: For each atom, parameterize the scattering factor ( f{\text{total}} ) as: [ f{\text{total}} = (1 - q) \cdot f{\text{neutral}} + q \cdot f{\text{ionic}} ] where ( q ) represents the partial charge, and ( f{\text{neutral}} ) and ( f{\text{ionic}} ) are the theoretical scattering factors for neutral and ionic forms, respectively [52].
Simultaneous Refinement: Refine the charge parameter ( q ) for each atom alongside the standard crystallographic parameters (coordinates and displacement parameters).
Convergence Criteria: Monitor agreement factors (e.g., R-values) to ensure proper convergence. The iSFAC method consistently improves the fit of chemical models with observed reflection intensities [52].
Essential Research Reagents and Materials
Table: Key Research Reagents and Solutions for iSFAC Experiments
| Item | Function | Application Notes |
|---|---|---|
| Crystalline Samples | Primary material for analysis | Any crystalline compound; demonstrated with pharmaceuticals, amino acids, zeolites [52] |
| Transmission Electron Microscope | Data collection platform | Standard instrument with electron diffraction capabilities |
| Cryogenic Cooling System | Sample preservation | Reduces radiation damage, essential for organic compounds |
| Electron Diffraction Data Processing Software | Structure solution | Standard crystallographic software packages |
| iSFAC Modelling Implementation | Charge refinement | Integrated into existing crystallographic workflows [52] |
Applications and Validation
Case Studies in Pharmaceutical and Biological Compounds
The iSFAC method has demonstrated remarkable versatility across diverse compound classes, providing unprecedented insights into charge distribution in molecular systems.
Ciprofloxacin
In the antibiotic ciprofloxacin hydrochloride, iSFAC modelling revealed distinctive charge patterns consistent with chemical intuition yet provided quantitative precision [52]. Key findings include:
- Carboxylic acid group: The carbon atom (C18) exhibited a positive partial charge of +0.11e, characteristic of a well-defined C=O double bond and C-O single bond without electron delocalization [52].
- Hydrogen atoms: All hydrogen atoms showed positive charges, balancing the negative charges on nearly all non-hydrogen atoms [52].
- Chloride counterion: Displayed strong negative charge as expected [52].
Amino Acids: Tyrosine and Histidine
Both tyrosine and histidine crystallize as zwitterions, and iSFAC modelling quantified their charge separation with atomic precision [52]:
- Carboxylate groups: The carbon atoms in carboxylate groups exhibited negative partial charges (C9: -0.19e in tyrosine; C6: -0.25e in histidine), reflecting electron delocalization [52].
- Amine groups: In tyrosine, the nitrogen atom (N1) carried a negative charge (-0.46e), while its associated protons showed positive charges (+0.39e, +0.32e, +0.19e), resulting in an overall positive amine group [52].
Table: Experimental Partial Charges in Amino Acids and Pharmaceutical Compounds
| Compound | Atom/Group | Partial Charge (e) | Chemical Interpretation |
|---|---|---|---|
| Ciprofloxacin | C18 (COOH) | +0.11 | Typical for undissociated carboxylic acid |
| Ciprofloxacin | Cl- | ~-1.00 | Counterion balancing positive charges |
| Tyrosine | C9 (COO-) | -0.19 | Delocalized electron density in carboxylate |
| Tyrosine | N1 (NH3+) | -0.46 | Nitrogen in ammonium group |
| Tyrosine | O1 (COO-) | -0.29 | Oxygen in carboxylate group |
| Histidine | C6 (COO-) | -0.25 | Delocalized electron density in carboxylate |
| Histidine | O1 (COO-) | -0.31 | Oxygen in carboxylate group |
Correlation with Theoretical Calculations
The experimental partial charges determined by iSFAC modelling show excellent agreement with quantum chemical computations. For all three organic compounds presented in the foundational study—ciprofloxacin, tyrosine, and histidine—the values demonstrate a strong Pearson correlation of 0.8 or higher with theoretical predictions [52]. This robust validation confirms the method's reliability and provides experimental verification of computational chemistry approaches.
Technical Considerations and Methodological Advantages
Comparison with Alternative Approaches
Figure 2: Charge Determination Technique Evolution. iSFAC modelling overcomes fundamental limitations of previous methods.
Enhanced Structural Features
Beyond charge determination, iSFAC modelling provides additional structural benefits:
- Improved Model Fit: The method consistently improves the agreement between chemical models and observed reflection intensities [52].
- Hydrogen Atom Refinement: iSFAC enables more reliable refinement of coordinates and atomic displacement parameters for protons, which is typically challenging in crystallography [52].
- Bonding Information: The quantitative charge values provide direct insight into bond polarity and electron delocalization effects.
The development of iSFAC modelling represents a transformative advancement in experimental physical chemistry, enabling the direct determination of atomic partial charges for any crystalline compound. By leveraging the intrinsic sensitivity of electron diffraction to electrostatic potentials and integrating seamlessly with standard crystallographic workflows, this method provides quantum-mechanically meaningful charge values that correlate strongly with theoretical predictions.
For researchers investigating molecular structure-property relationships, particularly in pharmaceutical development and materials design, iSFAC modelling offers an unprecedented experimental tool for quantifying charge transfer and distribution. The method's robust performance across diverse compound classes—from organic pharmaceuticals to inorganic zeolites—establishes it as a new fundamental technique in the structural science toolkit, advancing our ability to connect microscopic electronic structure with macroscopic chemical behavior.
Optimizing Precision: Key Factors Influencing Measurement Accuracy and Data Reliability
The photoelectric effect provides a foundational experimental verification of Planck's quantum theory, demonstrating that light energy is quantized into discrete packets called photons. For researchers and scientists, particularly those applying these principles in fields like quantum technology and material characterization, mastering the critical experimental factors of wavelength selection and stopping voltage determination is essential for obtaining accurate measurements of fundamental constants such as Planck's constant (h) and material work functions (Φ). This protocol details the established methodologies for conducting precise photoelectric measurements, framed within the broader context of experimental techniques for verifying quantum theory.
The theoretical foundation rests on the Einstein photoelectric equation [55] [56]: ( h\nu = e Vs + \phi ) where *h* is Planck's constant, *ν* is the frequency of incident light, *e* is the elementary charge, *Vs* is the stopping potential, and Φ is the work function of the photocathode material. This linear relationship between the photon energy (hν) and the stopping potential (V_s) forms the basis for the experimental determination of h and Φ.
The Scientist's Toolkit: Essential Research Reagent Solutions
The following table catalogues the essential apparatus required for conducting precise photoelectric measurements, detailing the specific function of each component in the experimental setup.
Table 1: Key Research Reagent Solutions for Photoelectric Measurements
| Component | Function & Importance in Experiment |
|---|---|
| Mercury Light Source | Provides a high-intensity, discrete line spectrum (e.g., 365 nm, 405 nm, 436 nm, 546 nm, 578 nm) essential for probing the frequency dependence of the photoelectric effect [55]. |
| Monochromator | Isolates specific spectral lines from the polychromatic source. Rotating the internal grating selects the desired wavelength, ensuring monochromatic light illuminates the photocathode [55]. |
| Vacuum Phototube | The core component where the photoelectric effect occurs. It contains a photocathode and an anode within an evacuated envelope to prevent electron scattering by gas molecules [56]. |
| Variable Voltage Source & "Voltage Adjust" Control | Applies a precise, adjustable retarding potential (stopping voltage) between the anode and cathode to counteract the kinetic energy of the emitted photoelectrons [55]. |
| High-Sensitivity Ammeter | Measures the resulting photocurrent, which can be on the order of microamperes (µA). A zero-adjust capability is crucial for nullifying dark current before measurement [55]. |
| Digital Multimeters | Used independently to accurately measure the applied stopping voltage and the resulting photocurrent, providing higher accuracy than built-in meters [55]. |
Core Experimental Protocols
Protocol 1: Wavelength Selection and Monochromator Optimization
Objective: To calibrate the experimental apparatus and select specific, discrete wavelengths from a mercury light source for illuminating the photocathode.
Principles: The kinetic energy of emitted photoelectrons depends linearly on the frequency, not the intensity, of incident light. Using discrete spectral lines allows for precise determination of this relationship [56].
Methodology:
- Apparatus Setup: Turn on the mercury lamp and allow a 5-minute warm-up period for the light output to stabilize. Ensure the phototube is not exposed to room light during power-on to prevent damage [55].
- Initial Wavelength Selection: Rotate the wavelength control knob on the monochromator to align with the yellow spectral line (578 nm) as an initial reference point. Visually confirm the light is visible at the exit slit [55].
- Phototube Coupling: Place the photoelectric cell on the stand, forming a light-tight seal with the monochromator's exit port to prevent ambient light from affecting the measurements [55].
- Current Optimization for Wavelength: Set the "voltage adjust" control fully counter-clockwise to a low retarding potential, allowing a measurable photocurrent. Fine-tune the wavelength control knob until the photocurrent reading is maximized, indicating optimal alignment for that specific spectral line [55].
- Iteration Across Spectrum: Repeat steps 2 and 4 for each required spectral line in sequence: green (546 nm), blue (436 nm), violet (405 nm), and ultraviolet (365 nm). For the non-visible UV line, carefully adjust the wavelength control beyond the violet position while monitoring for the appearance of a photocurrent [55].
Figure 1: Workflow for wavelength selection and apparatus optimization.
Protocol 2: Determination of the Stopping Voltage
Objective: To accurately determine the stopping potential, ( V_s ), for each monochromatic wavelength, which corresponds to the maximum kinetic energy of the emitted photoelectrons.
Principles: The stopping potential is the minimum reverse voltage required to prevent the most energetic photoelectrons from reaching the anode, reducing the net photocurrent to zero. Its accurate determination is critical for calculating Planck's constant [55] [56].
Methodology:
- Initialization and Zeroing: Before data collection for a given wavelength, turn the "voltage adjust" control fully clockwise to apply the maximum retarding potential. Cover the monochromator's entrance slit to block all light and use the "zero adjust" control to nullify the ammeter reading, compensating for any inherent offset or dark current [55].
- Data Acquisition: Uncover the light source. Systematically decrease the retarding potential in steps (e.g., initial 0.5 V steps, reducing to 0.1 V or smaller in the 'knee' region of the I-V curve). Record the photocurrent and the corresponding voltage for approximately 15-20 data points, ensuring sufficient resolution in the critical region where the current begins to rise sharply [55].
- Analysis via Intersecting Lines: The precise stopping potential, ( Vs ), is found from the I-V dataset by identifying the voltage at the "knee" of the curve. This is achieved by fitting two lines to the data [55]:
- Line 1 (Saturation Region): A horizontal line fit to data points at high retarding potentials where the current is stable and minimal.
- Line 2 (Knee Region): A line with a steep slope fit to data points where the photocurrent shows a rapid increase (typically a current increase of 200-400 µA). The voltage at the intersection point of these two lines is taken as the experimental value for ( Vs ) for that wavelength.
Figure 2: Analytical workflow for determining the stopping voltage.
Data Presentation and Analysis
Mercury Spectrum and Characteristic Data
The discrete emission lines of a mercury vapor lamp provide the ideal frequencies for this experiment. The following table lists the standard wavelengths used and their corresponding photon energies.
Table 2: Characteristic Spectral Lines of Mercury for Photoelectric Measurements
| Spectral Line | Wavelength (λ) in nm | Frequency (ν) in Hz | Photon Energy (hν) in eV* |
|---|---|---|---|
| Yellow (Doublet) | 578 | 5.19 × 10¹⁴ | 2.14 |
| Green | 546 | 5.49 × 10¹⁴ | 2.27 |
| Blue | 436 | 6.88 × 10¹⁴ | 2.84 |
| Violet | 405 | 7.41 × 10¹⁴ | 3.06 |
| Ultraviolet | 365 | 8.22 × 10¹⁴ | 3.39 |
Note: Photon energy calculated using ( E = \frac{1240}{\lambda(nm)} ) eV for convenience.
Final Determination of Planck's Constant and Work Function
After determining the stopping potential, ( V_s ), for each spectral line, the final calculation involves a linear regression analysis.
Table 3: Template for Data Analysis and Final Calculation
| Wavelength (nm) | Frequency (×10¹⁴ Hz) | Stopping Potential, V_s (V) | Kinetic Energy, e*V_s (eV) |
|---|---|---|---|
| 578 | 5.19 | (Measured) | (Calculated) |
| 546 | 5.49 | (Measured) | (Calculated) |
| 436 | 6.88 | (Measured) | (Calculated) |
| 405 | 7.41 | (Measured) | (Calculated) |
| 365 | 8.22 | (Measured) | (Calculated) |
Analysis Procedure:
- Plot the maximum kinetic energy of the electrons (( e V_s )) against the frequency (ν) of the incident light.
- Perform a linear fit to the data points. The equation of the line should conform to ( y = mx + c ), which corresponds to ( e V_s = h \nu - \phi ).
- Planck's Constant (h): The slope of the line, m, is equal to Planck's constant. In units of eV·s, this can be compared directly to the accepted value.
- Work Function (Φ): The negative of the y-intercept, -c, gives the work function, Φ, of the photocathode material in electronvolts. The threshold frequency, ( \nu_0 ), can be found from the x-intercept [55] [56].
Figure 3: Logical flow from raw data to the final determination of fundamental constants.
Light Emitting Diodes (LEDs) serve as exceptional experimental tools for verifying fundamental quantum theory, particularly Planck's quantum hypothesis which establishes that energy is emitted in discrete packets called quanta. The photoelectric effect in LEDs demonstrates quantum behavior directly, where the minimum voltage required to illuminate an LED correlates precisely with the energy of the emitted photons according to the relationship ( eV_a = hc/λ ) [57]. This application note addresses the significant technical challenges researchers face in obtaining accurate measurements of threshold voltage and wavelength—two parameters fundamental to calculating Planck's constant and validating quantum principles. As LED technology advances with developments in micro-LEDs [58] and specialized dopants [59], measurement protocols must evolve correspondingly to maintain precision in quantum verification experiments.
Fundamental Measurement Challenges
Threshold Voltage Determination
Accurately determining the threshold voltage (( Va )) presents multiple challenges for researchers. The transition between non-emissive and emissive states in an LED occurs across a voltage range rather than at a precise point, creating subjectivity in identifying the exact activation voltage [57]. Internal semiconductor properties, including energy losses at the p-n junction characterized by the ( φ/e ) term in the voltage equation, further complicate direct measurement [57]. Additionally, the forward voltage drop (( VF )) varies significantly across different semiconductor materials—from approximately 1.8V for red GaAsP LEDs to 4.0V for white GaInN LEDs [60]—requiring specialized measurement approaches for different LED types. Temperature dependence of semiconductor properties introduces another variable, as threshold measurements fluctuate with ambient temperature and internal heating effects during operation.
Wavelength Measurement Limitations
Precise wavelength characterization faces its own set of obstacles. Commercial LEDs emit light across a spectral bandwidth rather than at a single monochromatic wavelength, creating uncertainty in assigning a definitive λ value [57]. The plastic epoxy body of standard LEDs incorporates coloring agents that filter emitted light, potentially altering the perceived wavelength compared to the actual junction emission [60]. For advanced LED structures incorporating wavelength-dependent reflectors (WDRs) and complex cavity designs [61], the emission characteristics become increasingly complex to characterize. Furthermore, researchers without access to professional spectrometer equipment must rely on manufacturer specifications, which may lack the precision required for accurate Planck constant calculation.
Experimental Protocols
Threshold Voltage Measurement Protocol
Objective: Determine the activation voltage (( V_a )) of LEDs with maximum precision for quantum theory verification.
Materials and Equipment:
- LEDs of different colors (red, orange, green, blue) with clear, colorless casing [57]
- DC power supply (0-5V range) or 9V battery with voltage divider
- Two digital multimeters (voltage and current measurement)
- 1 kΩ potentiometer or programmable voltage source
- Temperature-stable environment chamber (recommended)
Procedure:
- Circuit Assembly: Construct the series circuit: Power supply → Potentiometer → Ammeter → LED → Voltmeter (in parallel across LED).
- Initial Configuration: Set potentiometer to maximum resistance to ensure minimal current flow at startup.
- Voltage Ramping: Increase voltage in 0.05V increments from 0V to 3V, allowing 30 seconds stabilization at each step [57].
- Current Monitoring: Record current reading at each voltage step, ensuring current remains below 5mA to prevent LED damage.
- Data Collection: Continue measurements until consistent linear current increase is observed beyond the activation point.
- Multiple Trials: Repeat procedure 3-5 times for each LED to account for measurement variability.
Data Analysis:
- Plot current (I) versus voltage (V) for each LED dataset.
- Identify the linear region where current increases steadily with voltage.
- Perform linear regression on the linear region data points.
- Extrapolate the regression line to the x-axis (current = 0); the x-intercept is ( V_a ).
- Calculate average ( V_a ) from multiple trials.
Table 1: Typical LED Characteristics for Quantum Experiments [57]
| LED Color | Typical Wavelength (nm) | Expected ( V_a ) (V) | Semiconductor Material |
|---|---|---|---|
| Red | 623 | 1.78 | GaAsP |
| Orange | 586 | 1.90 | GaAsP |
| Green | 567 | 2.00 | AlGaP |
| Blue | 467 | 3.60 | SiC/GaInN |
Wavelength Verification Protocol
Objective: Establish accurate wavelength values for LED emission spectra.
Method A: Manufacturer Specification Verification
- Obtain detailed datasheets from LED manufacturers specifying peak wavelength and spectral bandwidth
- Cross-reference multiple sources for the same LED type
- Note that wavelength varies with operating current; standardize measurements at 20mA
Method B: DIY Spectrometer Construction [57]
- Materials: Diffraction grating, narrow slit assembly, calibrated measurement rail, reference light sources (sodium or mercury)
- Calibration: Use reference light sources with known emission lines to establish wavelength-position relationship
- Measurement: Position LED at slit, measure diffraction pattern positions, calculate wavelength using calibration curve
Method C: Professional Spectrometer Usage
- Use calibrated scientific spectrometer with integrating sphere attachment
- Operate LED at standardized 20mA current during measurement
- Record peak wavelength and full width at half maximum (FWHM) bandwidth
- Perform multiple measurements to account for mode hopping in specific LED types
Advanced Technical Approaches
Liquid Crystal Detection Method
Recent advances in micro-LED inspection utilize liquid crystal (LC) films for non-contact voltage detection [58]. When placed over a micro-LED wafer, the LC film's transmittance changes in response to the open-circuit voltage generated by the LED through the photovoltaic effect. This approach enables detection of voltages as small as several volts without physical contact, eliminating measurement loading errors. The protocol involves:
- Preparing a uniform LC film overlay on the micro-LED wafer
- Illuminating the structure with appropriate wavelength light
- Monitoring transmittance changes in the LC layer correlated with voltage generation
- Calibrating transmittance-voltage relationship using reference sources
Machine Learning Optimization
Advanced research demonstrates machine learning algorithms can optimize threshold voltage in complex material systems. For liquid crystal composites, algorithms like AdaBoost (achieving R² = 0.96) can predict optimal dopant concentrations to minimize threshold voltage [59]. Implementation involves:
- Creating initial experimental dataset with varying material concentrations
- Training prediction models on the experimental data
- Using models to identify optimal concentration ratios
- Validating predictions with additional experiments
This approach reduced threshold voltage by 19% in E7 liquid crystal via (Al-Cu):ZnO doping [59].
Research Reagent Solutions
Table 2: Essential Materials for LED Quantum Experiments
| Category | Specific Item | Function/Application | Key Characteristics |
|---|---|---|---|
| LED Devices | GaAsP Red LED | Quantum verification standard | λ ≈ 630-660nm, V_F ≈ 1.8V @20mA [60] |
| AlGaP Green LED | Quantum verification | λ ≈ 550-570nm, V_F ≈ 3.5V @20mA [60] | |
| SiC/GaInN Blue LED | Quantum verification | λ ≈ 430-505nm, V_F ≈ 3.6V @20mA [60] | |
| Micro-LED arrays | Advanced quantum studies | Small size (few microns), requires LC inspection [58] | |
| Measurement Tools | Liquid crystal films | Non-contact voltage detection | Transmittance changes with applied voltage [58] |
| Precision potentiometer | Current limiting/voltage control | 1kΩ, low temperature coefficient [57] | |
| Digital multimeters | Voltage/current measurement | High impedance (>10MΩ) for accurate measurements [57] | |
| Advanced Materials | (Al-Cu):ZnO nanoparticles | Threshold voltage optimization | Dopant for liquid crystal composites [59] |
| E7 nematic liquid crystal | Host material for composites | Δε' = +13.8, Δn = 0.20, T_N-I = 60.5°C [59] |
Data Analysis and Planck Constant Calculation
Fundamental Equations:
- Photon energy: ( E_p = hc/λ ) [57]
- Voltage relationship: ( eV_a = hc/λ + φ ) [57]
- Linear form: ( V_a = (hc/e)(1/λ) + φ/e )
Analysis Procedure:
- Compile measured ( V_a ) and corresponding λ values for all tested LEDs
- Plot ( V_a ) versus ( 1/λ ) (reciprocal wavelength)
- Perform linear regression to determine slope (m)
- Calculate Planck's constant: ( h = me/c )
- Compare with accepted value (6.62607015 × 10⁻³⁴ J·s)
Error Reduction Strategies:
- Use LEDs with narrow spectral bandwidth
- Maintain constant temperature during measurements
- Employ statistical averaging across multiple trials
- Verify wavelength values experimentally when possible
Conceptual Framework and Workflows
Accurate measurement of LED threshold voltages and emission wavelengths remains challenging yet essential for experimental verification of Planck's quantum theory. By implementing the detailed protocols outlined in this application note—including proper circuit design, controlled measurement techniques, and advanced approaches like liquid crystal detection—researchers can overcome these challenges and obtain precise values for fundamental constants. The continued development of micro-LED technology [58] and machine learning optimization methods [59] promises further refinement of these experimental techniques, strengthening the connection between theoretical quantum mechanics and practical laboratory verification.
The verification of Planck's quantum theory rests upon precise experimental determination of fundamental relationships, such as the one between a blackbody's temperature and its emitted radiation spectrum. Incandescent lamp filaments, serving as gray-body approximations, are commonly used in student and research laboratories for determining constants like the Planck constant (h) through the Stefan-Boltzmann law [34]. However, the accuracy of these determinations is critically dependent on managing key experimental uncertainties, particularly in measuring the filament surface area and controlling its temperature [34]. This application note details standardized protocols and reagent solutions to mitigate these uncertainties, providing a robust framework for research aimed at experimental verification of quantum theoretical predictions.
Core Challenges in Blackbody Metrology
The primary challenge in using incandescent filaments for Planck constant determination lies in the accurate quantification of the relationship between electrical power dissipated in the filament and its radiated power. The derivation of the Planck and Stefan-Boltzmann constants relies on the formula for radiated power per unit surface area [34]. Table 1 summarizes the major sources of uncertainty and their impact on the determination of h.
Table 1: Key Sources of Uncertainty in Filament-Based Blackbody Experiments
| Uncertainty Source | Physical Origin | Impact on Planck Constant (h) Determination |
|---|---|---|
| Filament Surface Area | Difficult to measure directly due to complex coiled-coil geometry and surface roughness [34]. | Direct, proportional error; a 5% area error translates to a ~5% error in h. |
| Filament Temperature | Non-uniform temperature distribution along the filament; dependence on electrical operating conditions [34]. | High-sensitivity, non-linear error via the T4 dependence in the Stefan-Boltzmann law. |
| Non-Ideal Emissivity | Filament acts as a gray body (emissivity < 1), not a perfect blackbody [34]. | Introduces a systematic error requiring calibration or known emissivity data. |
Experimental Protocols
Protocol 1: Determination of Filament Surface Area
Accurate filament area measurement is a prerequisite for precise radiometric power calculation [34]. This protocol outlines two complementary methods.
A. Resistance-Based Area Calculation
This method infers the filament's cross-sectional area from its electrical properties [34].
- Principle: The electrical resistance of a uniform conductor is R = ρL / Across, where ρ is the resistivity, L is the length, and Across is the cross-sectional area.
- Procedure: a. Measure the room-temperature resistance (Rroom) of the filament using a digital multimeter. b. Using a calibrated optical microscope, measure the uncoiled length (L) of a filament sample from an identical lamp. c. Consult reference data for the resistivity (ρ) of tungsten at room temperature. d. Calculate the cross-sectional area: Across = ρL / Rroom. e. The total surface area A of the cylindrical filament is A = π * D * L, where the diameter D is derived from Across = π(D/2)2.
B. Digital Imaging Area Calculation
This method provides a direct visual measurement of the filament geometry [34] [62].
- Principle: Use a high-resolution digital camera and microscopy to image the filament and determine its dimensions with a calibrated pixel scale.
- Procedure: a. Mount the lamp to allow clear imaging of the filament. b. Place a calibration standard (e.g., a stage micrometer) in the same plane as the filament. c. Capture a high-resolution, high-contrast image. d. Using image analysis software (e.g., ImageJ), set the spatial scale using the calibration standard. e. Measure the filament's length and diameter at multiple points along its length. f. Calculate the average surface area based on the cylindrical geometry.
Table 2: Comparison of Filament Area Measurement Methods
| Method | Key Advantage | Key Limitation | Typical Estimated Uncertainty |
|---|---|---|---|
| Resistance-Based | Indirect; does not require direct optical access to the coiled filament. | Requires knowledge of material resistivity (ρ) and assumes uniform cross-section. | 2-5% |
| Digital Imaging | Direct measurement of physical dimensions. | Requires careful calibration and can be challenged by complex coiled geometries. | 3-7% |
Protocol 2: Temperature Control and Calibration
Precise temperature determination is critical due to the fourth-power relationship in the Stefan-Boltzmann law.
- Principle: Filament temperature is controlled via the applied electrical power and can be determined empirically from its resistance.
- Procedure: a. Four-Wire Resistance Measurement: Implement a four-wire (Kelvin) measurement setup to accurately determine the filament's resistance (Rhot) at various operating currents, excluding lead resistance errors. b. Temperature-Resistance Calibration: Use the known temperature coefficient of resistance for tungsten. The relationship is often approximated by Rhot/Rroom = 1 + α(T - Troom), where α is the temperature coefficient. c. Power Supply Stabilization: Use a stable DC power supply to minimize current fluctuations that cause temperature drift. The current and voltage across the filament should be measured with calibrated digital multimeters. d. Optical Pyrometry (Validation): For higher-temperature filaments, use an optical pyrometer focused on the filament to provide a non-contact temperature measurement for cross-validating the resistance-based method.
The Scientist's Toolkit: Research Reagent Solutions
Table 3: Essential Materials and Equipment for Blackbody Experiments
| Item | Specification / Example | Critical Function |
|---|---|---|
| Incandescent Lamp | Low-voltage, halogen-filled lamp with tungsten filament [34]. | Acts as the gray-body radiation source. Halogen gas reduces tungsten evaporation, maintaining filament integrity. |
| DC Power Supply | Low-ripple, digitally controlled, capable of fine current adjustment. | Provides stable electrical heating to maintain a constant filament temperature. |
| Precision Multimeters | Two 6.5-digit DMMs for 4-wire voltage and current measurement. | Accurately measures the electrical power dissipated in the filament. |
| Photodetector | Calibrated photodiode, phototransistor, or thermopile [34]. | Measures the total radiated power from the filament. |
| Light Filter | Narrow-bandpass or colored glass filter (e.g., green cellophane) [34]. | Selects a specific wavelength range for spectral radiance measurements. |
| Microscope & Camera | Calibrated optical microscope with a high-resolution CCD/CMOS camera [34] [62]. | Enables direct measurement of filament geometry for area calculation. |
Experimental Workflow and Uncertainty Analysis
The following diagrams map the core experimental workflow and the propagation of uncertainty.
Diagram 1: Blackbody Experiment Workflow
Diagram 2: Uncertainty Propagation Pathways
Successful experimental verification of Planck's quantum theory using blackbody methods demands rigorous management of measurement uncertainty. The protocols detailed herein for filament area determination and temperature control provide a pathway to reduce the dominant errors in these experiments. By adopting the standardized methodologies, reagent solutions, and analytical workflows outlined in this document, researchers can achieve higher precision in determining fundamental constants, thereby strengthening the empirical foundation of quantum mechanics. Future work will integrate advanced quantum metrology approaches, such as Rydberg atom electrometry, to provide a direct, primary standard for measuring blackbody radiation fields [63].
The Impact of Down-Conversion Processes in LED Light Emission on Accuracy
The down-conversion process, a cornerstone of modern solid-state lighting, involves the absorption of high-energy photons by a phosphor material and the subsequent emission of lower-energy photons. In Phosphor-Converted Light Emitting Diodes (PC-LEDs), this quantum phenomenon is harnessed to transform the blue light from a semiconductor chip into broad-spectrum white light [64]. Within the context of experimental techniques for verifying Planck's quantum theory, PC-LEDs serve as a practical and accessible platform for investigating quantum efficiency, energy transfer, and Stokes shift phenomena. The accuracy of light emission—encompassing its spectral power distribution, color quality, and luminous efficacy—is profoundly influenced by the physical and chemical properties of the down-conversion materials and the precise details of the experimental setup [64] [65]. This document provides detailed application notes and protocols for researchers aiming to conduct rigorous experiments on these systems.
Quantitative Data on Down-Conversion Materials and Performance
The performance of a PC-LED is quantitatively characterized by metrics such as Correlated Color Temperature (CCT), Color Rendering Index (CRI), and luminous efficacy. These outputs are highly dependent on the phosphor's chemical composition, particle size, and activator concentration [64].
Table 1: Impact of YAG:Ce³⁺ Phosphor Particle Size on PC-LED Performance [64]
| Median Particle Size, d₅₀ (μm) | Luminous Efficacy (lm/W) | Color Rendering Index (CRI) | Correlated Color Temperature (CCT) |
|---|---|---|---|
| 11 | 96.5 | 70.5 | 7000 K ± 200 K |
| 15 | 104.3 | 71.2 | 7000 K ± 200 K |
| 28 | 112.8 | 70.8 | 7000 K ± 200 K |
| 31 | 115.1 | 71.0 | 7000 K ± 200 K |
| 33 | 116.7 | 70.7 | 7000 K ± 200 K |
| 37 | 117.9 | 71.1 | 7000 K ± 200 K |
Table 2: Performance of Advanced Phosphor Systems for White Light Generation [64] [65]
| Phosphor System / Material | Composition (mol%) | Chromaticity Coordinates (x, y) | CCT (K) | Key Performance Features |
|---|---|---|---|---|
| YAG:Ce³⁺ | Y₃Al₅O₁₂:Ce³⁺ | (0.3075, 0.3130) | ~7000 | High efficacy; lacks red emission [64] |
| LuAG:Ce³⁺ | Lu₃Al₅O₁₂:Ce³⁺ | Varies with activator concentration | Tunable | Tunable emission with activator conc. [64] |
| Green-Red Phosphor Mixture | Blended phosphors | Tunable | Tunable | Superior CRI and white tone quality [64] |
| Up-Conversion Phosphor | 84.2 SiO₂ - 10 AlO₁.₅ - 0.3 Tm - 0.5 Er - 5 Yb | (0.33, 0.33) target | Tunable to ~5364 | White light via anti-Stokes shift [65] |
Experimental Protocols for PC-LED Fabrication and Characterization
Protocol 1: Fabrication of Coated Phosphor-Converted LEDs (PC-LEDs)
This protocol details the synthesis of a conventional coated PC-LED for fundamental studies of down-conversion efficiency [64].
3.1.1 Research Reagent Solutions and Materials Table 3: Essential Materials for PC-LED Fabrication
| Item | Function / Specification |
|---|---|
| Blue LED Chip | Excitation source (e.g., peak wavelength 441 nm) [64] |
| Cerium-doped Yttrium Aluminum Garnet (YAG:Ce³⁺) Phosphor | Down-conversion material; absorbs blue light and emits broad yellow spectrum [64] |
| Transparent Silicone Binder (e.g., OE 6550, Dow Corning) | Encapsulation matrix; holds phosphor particles, provides optical coupling and protection [64] |
| Solvents & Stirring Equipment | For creating a homogeneous phosphor-binder slurry [64] |
| Precision Balance | For accurate weighting of phosphor and binder to ensure reproducible phosphor layer density [64] |
| Curing Oven | For curing silicone binder (e.g., 1 hour at 150°C) [64] |
3.1.2 Workflow Diagram
3.1.3 Step-by-Step Procedure
- Chip Preparation: Mount a blue-emitting LED chip (e.g., peak emission ~441 nm) on a suitable substrate or chip-on-board platform. Operate the LED at a constant forward current (e.g., 350 mA) with active cooling to maintain a stable junction temperature (e.g., 25°C) during testing [64].
- Slurry Preparation: Precisely weigh a predetermined mass of YAG:Ce³⁺ phosphor powder. The mass is determined by the target white point chromaticity (e.g., x=0.3075, y=0.3130). Mix the phosphor with a transparent silicone binder to form a homogeneous slurry. The total volume of the slurry should be sufficient to fill the designated cavity (e.g., 40 mm³) [64].
- Coating Application: Pour the phosphor-silicone slurry into a ring surrounding the blue LED, ensuring it fills the cavity completely.
- Curing: Place the assembled unit in a curing oven at 150°C for one hour to solidify the silicone binder, forming a solid phosphor layer [64].
- Validation: The fabricated PC-LED is ready for spectral and photometric characterization as outlined in Protocol 3.
Protocol 2: Preparation of Lanthanide-Doped Up-Conversion Phosphors via Sol-Gel
This protocol describes the synthesis of up-conversion materials, which serve as a counterpoint to down-conversion processes and are relevant for studying anti-Stokes shifts [65].
3.2.1 Research Reagent Solutions and Materials Table 4: Essential Materials for Sol-Gel Up-Conversion Phosphor Synthesis
| Item | Function / Specification |
|---|---|
| Silicon and Aluminum Alkovide Precursors (e.g., TEOS, Al(O-iPr)₃) | Source for SiO₂ and AlO₁.₅ in the aluminosilicate matrix [65] |
| Lanthanide Salts (Tm³⁺, Er³⁺, Yb³⁺) | Activator and sensitizer ions; Yb³⁺ absorbs 980 nm pump light, transferring energy to Tm³⁺ (blue emitter) and Er³⁺ (green/red emitter) [65] |
| Solvents (e.g., Ethanol) | Medium for sol-gel reactions |
| 980 nm Infrared Diode Laser | Excitation source for up-conversion photoluminescence [65] |
3.2.2 Workflow Diagram
3.2.3 Step-by-Step Procedure
- Solution Preparation: Dissolve silicon (e.g., tetraethyl orthosilicate, TEOS) and aluminum alkoxide precursors in a suitable solvent like ethanol. Add precise amounts of lanthanide salt precursors (e.g., Tm(NO₃)₃, Er(NO₃)₃, Yb(NO₃)₃) to achieve the target composition (e.g., 84.2 SiO₂ - 10 AlO₁.₅ - 0.3 Tm - 0.5 Er - 5 Yb mol%) [65].
- Hydrolysis and Condensation: Add water under controlled pH and stirring to hydrolyze the alkoxides. The subsequent condensation reaction forms an inorganic network, resulting in a colloidal 'sol' [65].
- Gelation and Aging: Allow the sol to stand, leading to the formation of a wet 'gel'. This gel is then aged for several hours to strengthen its structure.
- Drying and Heat-Treatment: Slowly dry the gel to remove solvents, then heat-treat it at elevated temperatures (e.g., 500-900°C) to form a dense, glassy, lanthanide-doped aluminosilicate phosphor in bulk, powder, or thin-film form [65].
Protocol 3: Characterization of Spectral Power Distribution and Color Quality
This protocol outlines the critical measurements for quantifying the output accuracy of fabricated light sources.
3.3.1 Research Reagent Solutions and Materials
- Equipment: LED spectrometer (e.g., CAS 140, Instrument Systems) coupled with an integrating sphere [64].
- Equipment: Infrared diode laser (980 nm, for up-conversion materials) [65].
- Software: For calculating CCT, CRI, chromaticity coordinates (CIE x, y), and luminous efficacy from the measured spectral power distribution [64] [65].
3.3.2 Workflow Diagram
3.3.3 Step-by-Step Procedure
- Setup: Place the PC-LED or up-conversion phosphor sample at the center of an integrating sphere attached to the LED spectrometer. For up-conversion materials, use a 980 nm laser as the excitation source and focus it onto the sample [64] [65].
- Spectral Measurement: Measure the absolute spectral power distribution (SPD) of the source across the visible wavelength range (e.g., 380-780 nm). The integrating sphere ensures collection of light emitted in all directions [64].
- Data Analysis: Use appropriate software to calculate key performance metrics from the SPD:
- Luminous Efficacy (lm/W): The ratio of luminous flux (in lumens) to electrical input power (in watts).
- Chromaticity Coordinates (CIE x, y): The color point of the light on the CIE 1931 diagram.
- Correlated Color Temperature (CCT): The temperature of a Planckian black body radiator whose perceived color most closely matches that of the light source.
- Color Rendering Index (CRI): A measure of the ability of a light source to reveal the colors of various objects faithfully in comparison to a natural or ideal light source [64].
- Validation: Compare the measured SPD and derived metrics with simulations (e.g., from software like LightTools based on Mie theory) to validate the accuracy of the material and optical models [64].
Down-Conversion Pathways and Experimental Logic
The following diagrams illustrate the core quantum mechanical processes involved and the logical flow of a research project investigating them.
Diagram 1: Fundamental Photoluminescence Processes in LEDs
Diagram 2: Research Workflow for Validating Quantum Theory via PC-LEDs
Leveraging Remote-Access Laboratories for Consistent and Reproducible Results
The verification of quantum theory, from foundational experiments like Robert Millikan's photoelectric effect measurements to modern pharmaceutical applications, has always demanded experiments of the highest precision and reproducibility [53] [66]. However, access to the specialized, often costly, equipment required for cutting-edge quantum research can be a significant barrier. Remote-access laboratories are emerging as a transformative solution, enabling researchers to conduct high-fidelity experiments on quantum testbeds via optical fiber links, irrespective of their physical location [67] [68]. These facilities are crucial for advancing the experimental verification of Planck's quantum theory and its applications in fields like drug discovery, where understanding quantum phenomena at the molecular level is paramount [69] [66]. This application note details the protocols and methodologies for leveraging these remote resources to achieve consistent and reproducible results in quantum research.
The Case for Remote-Access Quantum Testbeds
Traditional quantum research is often confined to a single, well-resourced laboratory, making it difficult to test phenomena like entanglement over long distances or to facilitate broad collaboration [67]. Remote-access laboratories dismantle these barriers by providing a shared infrastructure.
The core value proposition of these testbeds includes:
- Democratizing Access: Researchers and students from institutions lacking specialized quantum hardware can remotely access state-of-the-art equipment [67]. This accelerates workforce development and technology transfer.
- Enhancing Reproducibility: By providing a standardized, well-characterized platform, remote testbeds allow multiple research groups to validate findings using the same hardware and environmental conditions, a critical step for scientific rigor.
- Facilitating Complex Protocols: A key application is the development of the quantum internet, which relies on distributing entanglement as a resource for revolutionary protocols like quantum repeaters and quantum state teleportation [70] [68]. This requires interconnecting different quantum systems over distance, a task for which remote testbeds are ideally suited.
Table 1: Representative Remote-Access Quantum Testbeds and Their Capabilities
| Testbed / Initiative | Reported Infrastructure | Key Demonstrated Capabilities / Objectives | Physical Link Details |
|---|---|---|---|
| University of Michigan Quantum Testbed [67] | Optical fiber link connecting two campus labs. | Remote quantum experiments; entangled light transfer; educational demonstrations. | 3-mile optical fiber link in Ann Arbor. |
| Urban Fiber Link (Saarbrücken) [68] | 14.4 km deployed urban dark fiber. | Photon-photon & ion-photon entanglement distribution; quantum state teleportation. | Mix of underground (majority) and overhead (1278 m) fiber. |
| NSF PCL Test Bed Program [71] | Aimed at creating a national network of AI-powered, remotely accessible labs. | Accelerating scientific discovery; enhancing reproducibility; standardized data collection. | Program in development; focus on a distributed network. |
Core Experimental Protocols for Quantum Communication
The following protocols are fundamental to quantum networking and have been successfully demonstrated over deployed fiber links, providing a blueprint for reproducible experimentation.
Protocol: Entanglement Distribution Over an Urban Fiber Link
This protocol outlines the steps for establishing and verifying entanglement between two remote nodes, a cornerstone for quantum networks [68].
1. Principle: Generate pairs of entangled photons and distribute one photon from each pair to a remote location via an optical fiber. Perform correlation measurements to verify that the entanglement is preserved despite environmental disturbances on the channel.
2. Materials and Setup:
- Entangled Photon Source: A high-brightness source, such as a type-II cavity-enhanced spontaneous parametric down-conversion (SPDC) source [68].
- Quantum Channel: A deployed optical fiber link, characterized for loss, polarization stability, and background light [68].
- Detection System: Superconducting nanowire single-photon detectors (SNSPDs) with high detection efficiency (>80%) [68].
- Stabilization System: An active polarization stabilization system to compensate for time-dependent fluctuations in the fiber [68].
- Filtering: Narrowband optical filters (e.g., 250 MHz transmission window) to suppress ambient and conversion noise [68].
3. Procedure: 1. Link Characterization: * Measure total optical loss of the fiber using optical time-domain reflectometry (OTDR). For the 14.4 km Saarbrücken link, a total loss of 10.4 dB was reported [68]. * Characterize the polarization-dependent loss (PDL). A mean PDL of 0.08 dB was measured for the Saarbrücken link, implying a high process fidelity (≥0.991) for qubit transmission [68]. * Quantify background photon counts at the receiver. With filtering, a mean background rate of 19.7 counts per second was achieved [68]. 2. Source Activation: Activate the SPDC source to generate entangled photon pairs (e.g., in the Bell state |Ψ⁺⟩ = (|H⟩|V⟩ + |V⟩|H⟩)/√2). 3. Photon Distribution: Transmit one photon from each pair through the quantum channel to the remote node. The other photon is detected locally. 4. Active Stabilization: Continuously run the polarization stabilization feedback loop to maintain the integrity of the polarization-encoded qubit. 5. Coincidence Measurement: At both local and remote nodes, record the arrival times of photons. Perform a coincidence measurement to identify photon pairs. 6. State Tomography: Measure the two-photon state in different polarization bases (H/V, +45°/-45°, R/L) to reconstruct the density matrix and calculate the entanglement fidelity.
4. Data Analysis:
- The fidelity of the entangled state is calculated by comparing the measured density matrix with the ideal Bell state.
- The visibility of quantum interference in different bases is a key metric of entanglement quality.
The following workflow diagram illustrates the entanglement distribution protocol:
Protocol: Quantum State Teleportation to a Remote Node
This advanced protocol teleports an unknown quantum state from a quantum memory (e.g., a trapped ion) onto a photon at a remote location, using entanglement as a resource [68].
1. Principle: A trapped ion and a photon are entangled. The photon is sent to a remote station. A Bell-state measurement (BSM) is performed between the ion and a second, "message" photon, whose state is to be teleported. The outcome of the BSM, communicated classically, dictates a unitary operation that, when applied to the remote photon, recreates the original message state.
2. Materials and Setup:
- Quantum Memory: A single trapped ion (e.g., ⁴⁰Ca⁺) [68].
- Entanglement Source: As in Protocol 3.1.
- Quantum Frequency Conversion (QFC): A polarization-preserving system to convert the wavelength of the photon entangled with the ion to the telecom C-band for low-loss fiber transmission [68] [72].
- Bell-State Measurement (BSM) Setup: A 50/50 beamsplitter and associated detectors for the BSM.
3. Procedure: 1. Ion-Photon Entanglement: Generate an entangled state between the trapped ion and a photon. 2. Frequency Conversion & Transmission: Convert the photon's wavelength to the telecom band and transmit it over the fiber to the remote node. 3. Bell-State Measurement: Bring the ion and the message photon into interaction and perform a BSM. This step destroys the message state but projects the ion and the remote photon into a correlated state. 4. Classical Communication: Transmit the outcome of the BSM (a two-bit message) to the remote node via a classical channel. 5. Unitary Operation: Based on the classical message, apply a corresponding unitary operation (e.g., a Pauli rotation) to the remote photon. 6. Verification: Measure the state of the remote photon to confirm it matches the original message state.
4. Data Analysis:
- The teleportation fidelity is calculated by comparing the input message state with the output state of the remote photon. A fidelity exceeding the classical limit (2/3 for qubits) confirms the quantum nature of the protocol.
The teleportation protocol logic is summarized below:
The Scientist's Toolkit: Research Reagent Solutions
This section details the essential components for building and operating a remote-access quantum testbed.
Table 2: Essential Materials for Remote-Access Quantum Experiments
| Item / Component | Function / Description | Example from Literature |
|---|---|---|
| Deployed Dark Fiber | Serves as the quantum channel for transmitting photonic qubits. | 14.4 km urban fiber link in Saarbrücken, with 10.4 dB loss [68]. |
| Entangled Photon Source | Generates the fundamental resource (entanglement) for quantum protocols. | Type-II cavity-enhanced SPDC source [68]. |
| Quantum Memory | Stores a quantum state for synchronized network operations. | Single trapped ⁴⁰Ca⁺ ion [68]. |
| Quantum Frequency Converter (QFC) | Transposes photon wavelength to the low-loss telecom C-band for long-distance travel. | Polarization-preserving QFC system [68]. |
| Superconducting Nanowire Single-Photon Detector (SNSPD) | Detects single photons with high efficiency and low noise. | SNSPDs with >80% detection efficiency at 1550 nm [68]. |
| Active Polarization Stabilization | Compensates for polarization drift in the fiber, crucial for qubit fidelity. | Feedback system using motorized waveplates or piezo controllers [68]. |
| Narrowband Optical Filter | Suppresses background light and noise to enable clear single-photon detection. | 250 MHz bandwidth filter used to reduce background to ~20 counts/s [68]. |
| Remote Access Portal | Software interface allowing external users to control experiments and access data. | Web portal (e.g., qreal.cloud) for running experiments and viewing prerecorded data [67]. |
Benchmarking Techniques: A Comparative Analysis of Accuracy, Limitations, and Applicability
Direct Comparison of Planck Constant Values from Different Experimental Methods
The Planck constant (ℎ) is a fundamental parameter of nature that appears in the description of phenomena on a microscopic scale and stands as the basis for the definition of the International System of Units (SI), particularly the kilogram [34]. Since its introduction by Max Planck in 1900 to explain blackbody radiation, determining its accurate value has been a central pursuit in experimental physics [15] [73]. This paper presents a direct comparison of Planck constant values obtained through different experimental methodologies, analyzing their respective protocols, accuracy, and limitations within the broader context of experimental techniques for verifying Planck's quantum theory.
The birth of quantum mechanics emerged from Planck's solution to the blackbody radiation problem, which required the radical assumption that energy is emitted and absorbed in discrete packets or "quanta" rather than continuously [15]. This hypothesis, which even Planck himself initially viewed as a mathematical convenience rather than physical reality, led to the formulation of E = hf, where h is Planck's constant, f is frequency, and E is the energy of the quantum [15]. The subsequent development of quantum theory through Einstein's explanation of the photoelectric effect, Bohr's atomic model, and modern quantum mechanics has made the accurate determination of ℎ essential to both theoretical and applied physics [15].
Quantitative Comparison of Experimental Values
Different experimental approaches yield Planck constant values with varying degrees of accuracy and precision. The following table summarizes results obtained from several methodologies:
Table 1: Comparison of Planck Constant Values from Different Experimental Methods
| Experimental Method | Reported Planck Constant Value (×10⁻³⁴ J·s) | Relative Error | Key Experimental Factors | Reference |
|---|---|---|---|---|
| Photoelectric Effect (Remote Exp.) | 5.98 ± 0.32 | ~5% | Stopping voltage measurement, filter selection, photocathode material | [34] |
| Photoelectric Effect (PASCO AP-9368) | 6.24 | ~6%* | Mercury lamp spectrum, stopping potential equilibrium | [32] |
| Photoelectric Effect (Custom RCA 935) | 4.39 | ~34%* | Mercury lamp, custom circuit, potentiometer adjustment | [32] |
| LED I-V Characteristics | Within 3-7% of accepted value | 3-7% | Threshold voltage determination, wavelength accuracy | [74] |
| Blackbody Radiation Methods | Varies (indirect via Stefan-Boltzmann constant) | Dependent on filament area measurement | Filament surface area determination, temperature measurement | [34] |
Note: Relative errors calculated based on accepted value of 6.626 × 10⁻³⁴ J·s
The comparative analysis reveals that the photoelectric effect method using standardized equipment (PASCO) and the LED I-V characteristics method provide the most accurate results in educational and basic research settings, with relative errors typically under 7% [32] [74]. The significant discrepancy observed in custom photoelectric setups highlights the importance of equipment calibration and methodology.
Detailed Experimental Protocols
Photoelectric Effect Method
The photoelectric effect demonstrates the particle nature of light and provides a direct method for determining Planck's constant through the relationship: eVₕ = hf - W₀, where Vₕ is the stopping potential, f is the frequency of incident light, and W₀ is the work function of the material [34].
Protocol Steps:
Apparatus Setup:
- Light source: Mercury vapor lamp with appropriate filters (or diffraction grating) to select specific wavelengths [32]
- Photocell with Sb-Cs (antimony-cesium) cathode or similar photoelectric material [34]
- Voltage source and high-impedance voltmeter (e.g., Keithly electrometer) [32]
- Optional: Remote access interface for automated data collection [34]
Safety Precautions:
Data Collection:
- For each wavelength/frequency, illuminate the photocathode and measure the resulting photocurrent [34]
- Apply stopping voltage between anode and photocathode until photocurrent reaches zero [34]
- Record this stopping potential (Vₕ) for each frequency [34]
- Repeat measurements for multiple wavelengths (typically 4-6 frequencies) [32]
Data Analysis:
The following workflow diagram illustrates the experimental process for determining Planck's constant using the photoelectric effect:
LED I-V Characteristics Method
Light-emitting diodes provide an alternative approach for determining Planck's constant based on the voltage at which they begin to emit light, corresponding to the energy band gap of the semiconductor material [74].
Protocol Steps:
Apparatus Setup:
Circuit Configuration:
Data Collection:
- Select first LED and slowly increase voltage from zero [74]
- Observe precise point when LED begins to emit light (using viewing pipe if available) [74]
- Record threshold voltage (Vₜ) when current begins to flow steadily [74]
- Alternatively, determine threshold voltage from tangent to linear part of I-V characteristic [74]
- Repeat for all LEDs in array (typically 5-7 diodes) [74]
Data Analysis:
The experimental workflow for the LED-based method is systematically presented below:
Advanced Metrology Methods
For context beyond educational laboratories, the most precise determinations of Planck's constant use advanced metrological approaches:
Watt Balance Technique (Now Kibble Balance):
Blackbody Radiation Methods:
The Scientist's Toolkit: Research Reagent Solutions
Table 2: Essential Materials and Equipment for Planck Constant Determination
| Item | Function/Application | Key Specifications | Experimental Considerations |
|---|---|---|---|
| Mercury Vapor Lamp | High-intensity light source with discrete spectral lines | 400-1000W, with UV emission capability | Requires 10+ minute warm-up; significant UV output needs shielding [32] |
| Interference Filters / Diffraction Grating | Wavelength selection for monochromatic light | Specific to mercury lines: 577/579nm (yellow), 546nm (green), 436nm (blue), 405nm (UV) | Filters provide specific wavelengths; gratings require proper alignment [32] |
| Photocell | Photoelectron emission | Sb-Cs cathode for visible-UV response; vacuum photodiode | Spectral response should match selected wavelengths [34] |
| LEDs (Various Colors) | Semiconductor light sources with known wavelengths | Multiple diodes covering visible spectrum (typically 5-7 colors) | Threshold voltage detection critical; use viewing pipe for ambient light exclusion [74] |
| Digital Multimeters | Voltage and current measurement | High impedance for voltage measurements; µA sensitivity for current | Precision directly impacts stopping voltage determination [74] |
| PASCO AP-9368 h/e Apparatus | Integrated photoelectric effect measurement | Self-contained unit with built-in photocell and voltage control | "Black box" convenience vs. understanding of internal workings [32] |
Critical Factors Influencing Measurement Accuracy
Each experimental approach introduces distinct potential error sources that researchers must address:
Photoelectric Effect:
- Stopping voltage determination: Precision in identifying the exact voltage where photocurrent reaches zero [34]
- Surface contamination: Affects work function of photocathode material [34]
- Temperature effects: Mercury lamp temperature influences spectral output and measurement consistency [75]
- Stray light: Ambient light contamination affecting photocurrent measurements [32]
LED Method:
- Threshold voltage determination: Identifying precise turn-on voltage significantly impacts results [34] [74]
- Wavelength accuracy: Manufacturer specifications vs. actual emission wavelengths [34]
- Non-monochromatic emission: LEDs emit across a bandwidth, not single frequency [34]
- Down-conversion processes: Phosphor-based white LEDs introduce additional energy conversion complexities [34]
Environmental and Instrumental Factors
- Temperature control: Mercury lamp surface temperature significantly affects Planck constant measurements; studies show optimal preheating duration minimizes error [75]
- Equipment calibration: Voltmeter accuracy and wavelength verification of filters/LEDs crucial [34]
- Measurement technique: "Zero current method" vs. tangent method for threshold detection [74] [75]
This direct comparison of experimental methods for determining Planck's constant demonstrates that while multiple approaches can yield reasonable values, methodological choices significantly impact accuracy and precision. The photoelectric effect remains the most direct method for demonstrating the quantum nature of light and determining ℎ, particularly with proper equipment calibration and attention to experimental conditions. The LED method provides an accessible alternative with potentially high accuracy when careful threshold voltage measurements are performed.
For educational laboratories, errors of 3-7% represent achievable targets, while research-grade measurements require more sophisticated methodologies like the watt balance technique. Future work should focus on refining measurement protocols, particularly for threshold detection in LED methods and temperature control in photoelectric measurements, to improve the accuracy of student determinations of this fundamental constant.
The consistent value of Planck's constant obtained through these diverse experimental methods provides strong confirmation of the quantum theory framework first established by Max Planck over a century ago, demonstrating the remarkable consistency of physical laws across different phenomenological domains.
Analyzing Statistical Consistency with the Accepted CODATA Value
Planck's constant ((h)) is a cornerstone of quantum mechanics, with its precise value critical for fields ranging from fundamental physics to pharmaceutical development. The Committee on Data for Science and Technology (CODATA) provides internationally recommended values of the fundamental physical constants, which are updated periodically using a least-squares adjustment (LSA) based on all available theoretical and experimental data [76]. For researchers, comparing experimentally determined values of Planck's constant with the CODATA recommendation is an essential exercise in validating experimental techniques and ensuring measurement traceability. This protocol details the methodology for performing such a comparison using a light-emitting diode (LED)-based experiment, a technique accessible in many laboratory settings.
The CODATA Framework and Planck's Constant
CODATA, through its Task Group on Fundamental Constants (TGFC), provides a self-consistent set of internationally recommended values for fundamental constants like Planck's constant. These values are determined through a rigorous process that identifies inconsistencies, re-evaluates uncertainties, and stimulates new experimental work [76].
- Adjustment Cycles: CODATA traditionally produces a new set of recommended values every four years, with the most recent regular adjustment being the 2022 adjustment, whose results were made available in 2024 [76].
- The Revised SI: Since 2019, the International System of Units (SI) has defined Planck's constant with an exact value of (h = 6.62607015 \times 10^{-34} \text{J·s}) [77]. This fixed value is used to define the kilogram. However, CODATA continues to provide adjusted values for a full set of constants that are consistent with this new definition, and the process of comparing experimental results to the accepted value remains a fundamental scientific practice [78] [76].
- Current Status: The CODATA-TGFC is actively working on these adjustments, with plans for a meeting in September 2024 to discuss new results and the ongoing 2022 adjustment [76].
Experimental Protocol: Determining Planck's Constant Using LEDs
This protocol describes a method to estimate Planck's constant by investigating the current-voltage characteristics of various colored LEDs [57] [79]. The underlying principle is that the minimum voltage required to activate an LED, known as the activation voltage ((V_a)), is related to the energy of the photons it emits, which in turn depends on the light's frequency and Planck's constant [80].
Research Reagent Solutions and Materials
Table 1: Essential materials and their functions for the LED experiment to determine Planck's constant.
| Item | Function |
|---|---|
| Colored LEDs (e.g., red, orange, green, blue) | Semiconductor devices that emit photons of specific wavelengths when a threshold voltage is applied [57]. |
| DC Power Supply (e.g., 9V battery) | Provides the adjustable voltage bias across the LED circuit [57]. |
| Potentiometer/Rheostat (1 kΩ) | Allows for fine, continuous control of the voltage applied to the LED [57]. |
| Multimeters (one as voltmeter, one as ammeter) | Measure the precise voltage across the LED and the current flowing through it [57]. |
| Spectrometer | Measures the peak wavelength ((\lambda)) of light emitted by each LED, which is crucial for calculating photon energy [80]. |
Step-by-Step Procedure
- Circuit Assembly: Construct the circuit as shown in Figure 1, connecting the LED in series with the ammeter and potentiometer, and in parallel with the voltmeter [57].
- Data Collection: For each LED, systematically increase the applied voltage in small steps (e.g., 0.05 V) from 0 V up to approximately 3 V. At each step, record the precise voltage and the corresponding electrical current. To prevent damage to the LEDs, ensure the current does not exceed 5 mA [57].
- Determine Activation Voltage ((Va)): Plot a graph of current versus voltage for each LED. The plot will typically show a region where the current increases linearly with voltage. Extrapolate this linear region backwards until it intercepts the voltage axis. The voltage at this intercept is the activation voltage, (Va) [57].
- Measure Wavelength: For each LED, use a spectrometer to determine the peak wavelength ((\lambda)) of the emitted light. Alternatively, use reliable manufacturer-provided wavelength data [57] [80].
Data Analysis and Comparison to CODATA
- Theoretical Relationship: The energy of a photon emitted by an LED is given by (Ep = h\nu = \frac{hc}{\lambda}), where (c) is the speed of light. This energy is provided by the applied voltage, related by (eVa = \frac{hc}{\lambda} + \phi), where (\phi) represents internal energy losses in the semiconductor [57]. For the purpose of determining (h), the simplified relationship (eV_a \approx \frac{hc}{\lambda}) is often used.
- Linear Regression: Rearranging the equation gives (Va \approx \frac{hc}{e} \cdot \frac{1}{\lambda}). Therefore, a plot of activation voltage ((Va)) against the reciprocal of the wavelength ((1/\lambda)) should yield a straight line.
- Calculate Planck's Constant: The gradient ((m)) of this line is equal to (\frac{hc}{e}). Planck's constant can then be calculated using the formula: [ h = \frac{m \cdot e}{c} ] where (e) is the elementary charge ((1.6022 \times 10^{-19}) C) and (c) is the speed of light in a vacuum ((2.9979 \times 10^8) m/s) [57].
- Statistical Consistency Check: Compare your experimentally derived value of (h) with the accepted CODATA value. Calculate the relative error and the statistical significance of any discrepancy. A well-performed experiment can achieve an error of less than 1% compared to the accepted value [57].
Workflow and Data Analysis Visualization
The following diagrams illustrate the key procedural and analytical pathways for this experiment.
Experimental Workflow
Diagram 1: LED experiment workflow.
Data Analysis Pipeline
Diagram 2: Data analysis pipeline.
The LED-based experiment provides a robust and accessible method for determining Planck's constant and verifying the result against the CODATA recommended value. This process exemplifies the core scientific practice of experimental verification underpinning quantum theory. The principles of this protocol—careful measurement, control of variables, and statistical comparison to a standard—are directly analogous to calibration and validation procedures in pharmaceutical research and development. Mastery of such techniques ensures data integrity and reinforces the fundamental connection between experimental observation and physical theory.
Within the rigorous framework of experimental physics, the verification of foundational theories like Planck's quantum hypothesis necessitates a careful balance in methodological selection. Researchers are perpetually confronted with a critical triad of considerations: the simplicity of an experimental setup, the precision of its measurements, and the associated cost in terms of resources, time, and complexity. This document outlines application notes and protocols for key experiments, providing a structured analysis of these trade-offs to guide research design and decision-making in the context of quantum theory validation.
Theoretical Background and Quantitative Data
Planck's 1900 quantum hypothesis, which proposed that energy is emitted or absorbed in discrete units or "quanta" ((E = h\u nu)), marked a fundamental departure from classical physics [5]. Its verification and the development of subsequent quantum theory rested on pivotal experiments, the quantitative outcomes of which are summarized in the table below.
Table 1: Key Early Quantum Experiments and Their Quantitative Outcomes
| Experiment/Theory (Year) | Key Researcher(s) | Primary Quantitative Outcome | Methodological Implication |
|---|---|---|---|
| Planck's Quantum Hypothesis [5] | Max Planck (1900) | Resolved ultraviolet catastrophe in blackbody radiation; introduced Planck's constant (h). | Required a departure from continuous energy models, increasing theoretical complexity for greater predictive precision. |
| Photoelectric Effect [5] | Albert Einstein (1905) | Kinetic energy of ejected electrons depends on light frequency (f), not intensity; validated (E = hf). | Experimental setup is relatively simple, but requires precise measurement of electron energy and light frequency. |
| Bohr Atomic Model [5] | Niels Bohr (1913) | Successfully predicted the spectral lines of hydrogen using quantized electron orbits. | Model is semi-classical, offering simplicity but limited precision for multi-electron atoms. |
| Franck-Hertz Experiment [5] | James Franck & Gustav Hertz (1914) | Measured discrete energy loss of electrons colliding with atoms, providing direct evidence for quantized atomic energy levels. | Provides direct, quantized evidence of energy levels, but requires precise control of electron beams and potentials. |
| Stern-Gerlach Experiment [5] | Otto Stern & Walther Gerlach (1922) | Observed discrete splitting of a silver atom beam in a magnetic field, demonstrating spatial quantization. | Technically complex and costly due to need for high vacuum and non-uniform magnetic fields, but offers high-precision evidence of quantization. |
Detailed Experimental Protocols
Protocol A: Verifying Energy Quantization via the Franck-Hertz Experiment
This protocol provides a methodology to demonstrate the quantized nature of atomic energy levels.
1. Research Reagent Solutions & Essential Materials
Table 2: Essential Materials for the Franck-Hertz Experiment
| Item | Function/Justification |
|---|---|
| Franck-Hertz Tube (e.g., filled with Mercury vapor) | Contains the low-pressure gas whose quantized energy levels are to be investigated. |
| Adjustable DC Power Supply ((U_F)) | Heats the cathode to produce electrons via thermionic emission. |
| Variable DC Power Supply ((U_G)) | Creates an accelerating potential to give kinetic energy to the electrons. |
| Small Counter Voltage ((U_A)) | Creates a small retarding potential to selectively collect only electrons that did not lose energy in inelastic collisions. |
| Electrometer/Nano-ammeter | Precisely measures the plate current ((I_A)), which drops at resonance energies. |
| Oven (for Mercury tubes) | Maintains the tube at a constant temperature to regulate vapor pressure. |
2. Methodology
- Step 1: Apparatus Setup. Place the Franck-Hertz tube in the oven (if required) and connect all power supplies and the ammeter according to the standard Franck-Hertz circuit configuration. Ensure all ground connections are common.
- Step 2: Stabilization. Allow the oven to reach and stabilize at the recommended operating temperature (e.g., ~150-200°C for mercury) to ensure a constant, optimal vapor density inside the tube.
- Step 3: Data Collection. With a fixed filament voltage ((UF)) and counter voltage ((UA)), slowly and continuously increase the accelerating voltage ((U_G)) from 0V to approximately 30-50V.
- Step 4: Current Measurement. Record the plate current ((IA)) reading from the ammeter at regular intervals of the accelerating voltage (UG).
- Step 5: Analysis. Plot the collected data with (UG) on the x-axis and (IA) on the y-axis. The resulting curve should show a series of distinct dips in current. The voltage difference between consecutive dips corresponds to the first excitation energy of the gas atoms.
3. Workflow Visualization
Protocol B: Demonstrating Spatial Quantization via the Stern-Gerlach Experiment
This protocol outlines the procedure for observing the spatial quantization of angular momentum.
1. Research Reagent Solutions & Essential Materials
Table 3: Essential Materials for the Stern-Gerlach Experiment
| Item | Function/Justification |
|---|---|
| Oven | Heats a sample of silver to produce a beam of neutral silver atoms. |
| Collimators | A series of slits to define a narrow, straight atomic beam. |
| Inhomogeneous Magnet | The core component; its strong, non-uniform field exerts a force on atoms with a magnetic moment, causing beam splitting. |
| High-Vacuum Chamber | Encloses the entire path to prevent scattering of the atomic beam by air molecules. |
| Detection Plate | A glass or metal plate where the atomic beam impinges, forming a visible deposit. |
2. Methodology
- Step 1: Evacuation. Pump down the vacuum chamber to a high vacuum (typically < 10⁻⁵ mbar) to ensure a collision-free path for the atoms.
- Step 2: Atom Beam Generation. Heat the oven containing silver until it produces a sufficient flux of silver atoms. The atoms travel through the collimator slits to form a thin beam.
- Step 3: Magnetic Deflection. Pass the atomic beam through the strong, inhomogeneous magnetic field. Atoms with magnetic moments will experience a force proportional to the z-component of their magnetic moment.
- Step 4: Detection. Allow the atom beam to impinge upon the detection plate for a set duration.
- Step 5: Visualization and Analysis. Remove the plate and develop it (if using a material that requires it). Observe the pattern: two distinct lines instead of a single smeared line, indicating discrete quantized states.
3. Workflow Visualization
Analysis of Methodological Trade-offs
The choice between experimental methods like Franck-Hertz and Stern-Gerlach exemplifies the core trade-off between simplicity and precision, which is often directly linked to cost [81].
- Franck-Hertz Trade-offs: The Franck-Hertz experiment offers a favorable simplicity-to-precision ratio. The electronic setup and data collection are relatively straightforward, making it a cost-effective and accessible demonstration of energy quantization for teaching and basic verification. However, its precision can be limited by factors like space charge effects and the need for precise temperature control for certain gases. Achieving higher precision requires more sophisticated vacuum systems and measurement electronics, thereby increasing cost.
- Stern-Gerlach Trade-offs: The Stern-Gerlach experiment, in contrast, leans towards high precision and fundamental insight at the expense of simplicity and cost. The requirement for a high vacuum, a specially designed inhomogeneous magnet, and a sensitive detection system makes it a complex and expensive endeavor. This high cost is the price paid for its unambiguous, visual demonstration of spatial quantization, a finding that was pivotal for the development of quantum mechanics [5].
This balance is a general principle in scientific tool development. Methodological improvements that increase precision can "inadvertently reduce their practical usability" by increasing complexity and data requirements, which is a critical consideration for researchers [81]. The decision framework can be visualized as a balance between these three factors, where improving one often compromises another.
Data Presentation Guidelines
Effective communication of experimental results is paramount. Adhering to established design principles for data presentation aids in clarity and comprehension [82]. The following guidelines should be applied when constructing tables and figures for publications or reports:
- Aid Comparisons: Facilitate easy comparison of values by using right-flush alignment for numerical data and employing a tabular font where each character has the same width [82].
- Reduce Visual Clutter: Avoid heavy grid lines and unnecessary repetition of units in table cells. Use white space strategically to group related data [82].
- Increase Readability: Ensure headers stand out from the table body. Use clear, active titles and highlight statistical significance or outliers [82].
- Ensure Accessibility: For all visual elements, including diagrams, ensure sufficient color contrast. For standard text, a minimum contrast ratio of 4.5:1 is required, while large-scale text should have a ratio of at least 3:1 [83]. The color palette specified for the diagrams in this document is chosen to comply with these guidelines.
Correlating Experimental Results with Quantum Chemical Computations
The verification of quantum theory has been a cornerstone of physical science since its inception. The journey began with Max Planck's 1900 quantum hypothesis to solve the blackbody radiation problem, introducing the fundamental concept that energy is emitted or absorbed in discrete quanta [15]. This was followed by Albert Einstein's 1905 explanation of the photoelectric effect, which provided crucial evidence for the particle-like behavior of light [5]. A pivotal moment in verification history came with Robert Millikan's 1916 experimental work, which provided the first direct experimental proof of Einstein's photoelectric equation and a highly accurate determination of Planck's constant (h ≈ 6.57 × 10⁻²⁷ erg-second), despite his initial skepticism about the photon concept itself [53].
This historical context establishes a fundamental paradigm: theoretical quantum predictions require rigorous experimental validation. In the modern era, this verification process has expanded to include sophisticated computational methods. Quantum chemical computations now serve as a crucial bridge between fundamental quantum theory and experimental observables, allowing researchers to interpret experimental data, predict outcomes, and verify the accuracy of quantum mechanical models for molecular systems.
Foundational Experimental Verifications and Their Modern Computational Analogues
The early experimental verifications of quantum theory established physical protocols that have direct analogues in modern computational chemistry practices. The table below summarizes these foundational experiments and their contemporary counterparts.
Table 1: Foundational Quantum Experiments and Modern Computational Analogues
| Foundational Experiment | Key Verification Methodology | Modern Computational Analogue |
|---|---|---|
| Planck's Blackbody Radiation (1900) [15] | Matching mathematical formula to experimental emission spectra across all wavelengths. | Fitting computational predictions to experimental spectroscopic data. |
| Einstein's Photoelectric Effect (1905) [5] | Measuring electron kinetic energy vs. light frequency, independent of intensity. | Calculating ionization potentials and electron binding energies via quantum methods. |
| Millikan's Photoelectric Measurement (1916) [53] | "Machine shop in vacuo": Cleansing metal surfaces in vacuum to ensure reproducible electron ejection energy measurements. | Using clean, well-defined molecular geometries and accounting for environmental effects in simulations. |
| Franck-Hertz Experiment (1914) [5] | Demonstrating inelastic electron-atom collisions with discrete energy transfer. | Computing quantized energy levels and electronic excitation spectra. |
Core Verification Workflow
The following diagram illustrates the integrated workflow for correlating experimental and computational data, a process central to modern quantum research.
Quantum Chemical Computation Methods and Uncertainty Quantification
Modern quantum chemistry offers a hierarchy of methods for computing molecular properties, with the coupled cluster theory with single, double, and perturbative triple excitations (CCSD(T)) often considered the "gold standard" for achieving chemical accuracy (typically defined as an error < 1 kcal mol⁻¹) [84]. Recent advances in local electron correlation methods, such as the Local Natural Orbital (LNO) CCSD(T) approach, have made these high-accuracy computations accessible for systems containing hundreds of atoms, drastically reducing computational resource requirements from months to days on a single CPU [84].
The Critical Role of Correlation in Uncertainty
A key consideration in verification is the treatment of uncertainty. In quantum chemical calculations, input parameters like reaction barrier heights and vibrational frequencies are not independent. Parameter correlation significantly impacts the uncertainty of predicted rate coefficients and branching ratios in chemical reactions [85].
Table 2: Impact of Parameter Correlation on Theoretical Predictions
| Calculation Type | Input Parameter Treatment | Effect on Uncertainty of Rate Coefficients | Effect on Uncertainty of Branching Ratios |
|---|---|---|---|
| Transition State Theory (TST) | Independent Parameters | Baseline (Larger Uncertainty) | Baseline (Larger Uncertainty) |
| Transition State Theory (TST) | Correlated Parameters | ~30% Reduction | ~45% Reduction |
| RRKM/Master Equation (ME) | Independent Parameters | Baseline (Larger Uncertainty) | Baseline (Larger Uncertainty) |
| RRKM/Master Equation (ME) | Correlated Parameters | ~33% Reduction | ~50% Reduction |
Ignoring these correlations and treating all input parameters as independent leads to a significant overestimation of the final uncertainty in simulation results. Properly accounting for correlation is therefore essential for meaningful comparison with experimental data [85].
Application Notes: Detailed Protocols for Correlation
Protocol 1: Benchmarking Computational Methods Against Experimental Data
This protocol outlines the process for validating the accuracy of a quantum chemical method using known experimental data.
1. System Selection: Choose a set of well-characterized molecules or reactions for which high-quality experimental data exists (e.g., bond energies, reaction rates, spectral lines). 2. Computational Setup: - Method Selection: Start with cost-effective methods like Density Functional Theory (DFT) and progress to high-level methods like CCSD(T) or local CCSD(T) (e.g., LNO-CCSD(T)) for benchmarking [84]. - Basis Set: Select an appropriate basis set, ensuring a balance between accuracy and computational cost. - Geometry Optimization: Fully optimize the molecular geometry of reactants, products, and transition states. 3. Calculation Execution: Compute the target physicochemical properties (e.g., reaction energy, activation barrier, vibrational frequency). 4. Correlation and Error Analysis: - Plot computed values against experimental values. - Calculate statistical measures: Mean Absolute Error (MAE), Root Mean Square Error (RMSE), and correlation coefficients (R²). - Identify systematic errors and method-specific biases. 5. Uncertainty Quantification (UQ): Perform a global UQ analysis, accounting for correlations among quantum chemical parameters to produce a reliable uncertainty estimate for the method [85].
Protocol 2: Using Computation to Interpret Novel Experimental Results
This protocol describes how to use validated quantum chemical methods to interpret data from new experiments where the outcome is unknown.
1. Experimental Data Input: Obtain raw data from the laboratory (e.g., mass spectrum, infrared spectrum, kinetic profile). 2. Hypothesis Generation: Propose potential molecular structures, reaction pathways, or intermediates consistent with the experimental observations. 3. Computational Modeling: - System Preparation: Build computational models for the hypothesized structures or mechanisms. - Property Prediction: Using a previously validated method, calculate the spectroscopic, energetic, or kinetic properties corresponding to the experimental measurables. 4. Comparison and Inference: Statistically compare the computed properties with the experimental data. The hypothesis with the strongest correlation (e.g., lowest error, best spectral match) is supported by the computation. 5. Iterative Refinement: If the correlation is weak, refine the hypothesis (e.g., propose a new transition state or intermediate) and repeat the calculation until a satisfactory match is achieved, as illustrated in the workflow diagram in Section 2.1.
Correlation Analysis and Workflow
The following diagram details the logical process of analyzing correlations between computed and experimental data, which is central to both protocols.
The Scientist's Toolkit: Essential Research Reagents and Solutions
This section details key computational and analytical "reagents" essential for research in this field.
Table 3: Essential Research Reagents and Computational Tools
| Tool / Reagent | Type | Primary Function in Correlation Studies |
|---|---|---|
| Local Correlation Methods (e.g., LNO-CCSD(T)) [84] | Computational Method | Provides "gold standard" quantum chemical accuracy for energies and properties of large molecules at an affordable computational cost. |
| Uncertainty Quantification (UQ) Framework [85] | Analytical Protocol | Quantifies and propagates uncertainties from quantum inputs to final predictions, enabling statistically rigorous comparison with experiment. |
| High-Performance Computing (HPC) Cluster | Hardware Infrastructure | Supplies the processing power required for high-level electronic structure calculations on complex molecular systems. |
| Global Sensitivity Analysis [85] | Analytical Software | Identifies which quantum chemical input parameters (e.g., energies, frequencies) most strongly influence the final output uncertainty. |
| Pearson Correlation Analysis [85] | Statistical Tool | Quantifies the degree of linear correlation between parameters in quantum chemical calculations or between computed and experimental results. |
| Benchmark Experimental Datasets | Data | Provides reliable, high-quality reference data (e.g., ionization potentials, bond dissociation energies) for validating computational methods. |
The Role of Experimental Evidence in Shifting Quantum Interpretations
The interpretation of quantum mechanics has been a subject of intense debate since the theory's inception. While the mathematical formalism provides remarkably accurate experimental predictions, the physical reality underlying these equations remains contested. The Many-Worlds Interpretation (MWI), first proposed by Hugh Everett in 1957, offers a compelling resolution to the measurement problem by positing that all possible outcomes of quantum measurements physically occur in branching parallel worlds [86]. For decades, these interpretations remained largely philosophical. However, we are now witnessing a paradigm shift where advanced experimental techniques are moving these discussions from pure theory toward empirically testable science. This document examines how cutting-edge experiments are providing evidence that is actively reshaping our understanding of quantum reality, framed within the ongoing research program to verify and extend Planck's quantum theory.
Theoretical Foundations of Quantum Interpretations
The Many-Worlds Interpretation
The MWI consists of two fundamental components. First, it proposes that the quantum state of the entire universe evolves unitarily according to the Schrödinger equation, making the process deterministic rather than probabilistic. Second, it establishes a correspondence between this universal quantum state and our subjective experiences [86]. In this framework, what we perceive as wavefunction collapse is actually a branching process where each possible outcome manifests in a newly created world. This eliminates the need for special collapse rules or observers with privileged status, providing a elegantly simple ontology at the cost of an expansive multiverse.
Challenging Classical Intuitions
Alternative interpretations challenge even more fundamental assumptions. Some physicists propose that q-numbers (quantum numbers), not particles or fields, constitute the true essence of reality [87]. In this radical view, particles are emergent phenomena from more fundamental quantum properties. Furthermore, the very concepts of space and time are being questioned, with some frameworks treating them as derivative bookkeeping devices rather than fundamental entities [87]. These perspectives emerge from taking the mathematical structure of quantum theory seriously, without forcing it to conform to classical intuitions.
Experimental Techniques and Evidence
Table of Key Experimental Evidence
Table 1: Quantitative summary of key experiments shaping quantum interpretations
| Experimental Phenomenon | Key Quantitative Results | Technical Methodology | Interpretational Significance |
|---|---|---|---|
| Negative Time Duration | Measured negative time spent by photons tunneling through barriers [88] | Indirect measurement via atomic excitation within barrier; Andreev STM technique | Challenges causality, suggests quantum mechanics operates outside classical time |
| Gravity-Mediated Entanglement (GME) | Entanglement generated between masses of ~10^-14 kg at separations of ~200 μm [89] | Precise control of micro-scale masses in superposition; witness entanglement | Suggests gravity must be quantum in nature; evidence against classical spacetime |
| Intrinsic Topological Superconductivity | Identified in UTe₂ with zero-energy surface states [90] | Scanning tunneling microscope with Andreev reflection mode | Confirms existence of Majorana fermions, enabling fault-tolerant quantum computing |
| Single-Particle Entanglement | Violation of Bell's inequality with individual photons [87] | Photons split between locations; Bell inequality tests | Demonstrates quantum reality extends beyond particles to q-numbers |
Detailed Experimental Protocols
Protocol: Testing Negative Time in Quantum Tunneling
Objective: Measure the time duration photons spend tunneling through an optical barrier.
Materials and Equipment:
- Single-photon source capable of producing well-defined wave packets
- Atomic cloud barrier (e.g., cesium atoms in magneto-optical trap)
- High-sensitivity single-photon detectors with precise timing resolution
- Atomic state detection system for monitoring excitations within barrier
Methodology:
- Photon Preparation: Generate identical single-photon wave packets with well-characterized temporal profiles using quantum dot sources.
- Barrier Characterization: Precisely measure the atomic density and energy levels of the barrier medium to determine its transmission properties.
- Time-Resolved Detection:
- Start timer synchronized with photon emission
- Monitor atomic excitations within the barrier using fluorescence detection
- Record precise arrival time of transmitted photons at detectors
- Compare with control measurements without barrier
- Data Analysis: Calculate tunneling duration using modern definitions of arrival time and dwell time in quantum mechanics. The shocking result consistently shows negative duration measurements [88].
Interpretation: The negative duration values challenge our classical understanding of time but can be mathematically derived from quantum formalism. This suggests that at quantum scales, our macroscopic intuition about temporal sequence becomes inadequate.
Protocol: Verifying Gravity-Mediated Entanglement
Objective: Determine whether the gravitational interaction alone can generate entanglement between two masses.
Materials and Equipment:
- Two micro-mechanical oscillators (~~10^-14 kg mass) with precise position control
- Ultra-high vacuum chamber to eliminate decoherence
- Cryogenic system to minimize thermal noise
- Quantum non-demolition measurements for position monitoring
- Entanglement witness measurements (Bell inequality tests)
Methodology:
- Initial State Preparation: Cool both masses to their quantum ground state using optical or magnetic techniques.
- Superposition Creation: Place each mass into a spatial superposition using precise laser pulses, with careful isolation from other potential interactions.
- Gravitational Interaction: Allow the systems to interact purely gravitationally for a controlled duration.
- Entanglement Verification:
- Perform correlated measurements on both masses
- Calculate correlation functions from measurement statistics
- Test for violation of Bell inequalities
- Control Experiments: Repeat with electromagnetic shielding to confirm gravitational origin of any observed entanglement.
Interpretation: As established through Generalised Probabilistic Theories (GPTs), a local interaction with a classical system cannot generate entanglement. Therefore, observed entanglement would demonstrate that gravity must possess quantum characteristics [89].
Visualization of Quantum Interpretation Experiments
Quantum Tunneling Time Measurement Setup
Gravity-Mediated Entanglement Logic
The Scientist's Toolkit: Research Reagent Solutions
Table 2: Essential materials and equipment for quantum interpretation experiments
| Research Reagent/Equipment | Function in Experiments | Specific Application Example |
|---|---|---|
| Andreev Scanning Tunneling Microscope (STM) | Visualizes topological surface states at atomic scale | Identifying intrinsic topological superconductivity in UTe₂ [90] |
| Single-Photon Sources | Produces individual photons on demand | Testing wave packet reshaping in tunneling experiments [88] |
| Micro-Mechanical Oscillators | Tiny masses that can be placed in quantum superpositions | Gravity-mediated entanglement experiments [89] |
| Atomic Cloud Barriers | Creates precisely controllable potential barriers | Studying negative time durations in quantum tunneling [88] |
| Cryogenic Systems | Reduces thermal noise and decoherence | Maintaining quantum states in gravity experiments [89] |
| Bell Inequality Test Apparatus | Measures quantum correlations to verify entanglement | Confirming gravity-mediated entanglement between masses [89] |
Implications for Planck's Quantum Theory Research
The experimental evidence summarized herein represents a significant advancement in the century-long research program initiated by Planck's quantum hypothesis. We are transitioning from verifying quantum theory's predictions to testing its fundamental ontological commitments. The observed negative time durations challenge our understanding of temporal causality, while gravity-mediated entanglement experiments probe quantum behavior in the gravitational domain—a frontier Planck himself could not have envisioned. These developments suggest that completing Planck's research program requires not just technical refinement but potentially revolutionary conceptual changes in how we understand reality at its most fundamental level.
The convergence of theory and experiment in quantum foundations is accelerating due to novel visualization techniques like the Andreev STM and precise quantum control methodologies. These tools enable researchers to directly observe quantum phenomena that were previously only theoretical postulates, providing empirical constraints that are actively shifting the scientific consensus regarding quantum interpretations. As this trend continues, we anticipate that within the coming decade, experiments will definitively resolve long-standing questions about the reality of the quantum state and the relationship between quantum theory and gravity.
Conclusion
The journey to verify Planck's quantum theory has evolved from foundational thought experiments to a suite of highly precise, diverse methodologies. The consistent value of Planck's constant obtained through techniques ranging from classic photoelectric effects to modern electron diffraction and watt balances stands as a testament to the theory's robustness. For biomedical and clinical researchers, these verification techniques are not merely historical footnotes. The principles they validate are the bedrock of modern tools. Advanced methods for determining partial atomic charges, as demonstrated in 2025 research, promise profound implications for drug design by enabling a deeper understanding of molecular interactions, binding affinities, and reaction pathways at the quantum level. The future of experimental quantum verification lies in pushing these techniques to greater precision and applying them to increasingly complex molecular systems, ultimately enabling the rational design of novel therapeutics and materials with atomic-scale precision.
References
- 1. Ultraviolet catastrophe [https://en.wikipedia.org/wiki/Ultraviolet_catastrophe]
- 2. 1.2: Quantum Hypothesis Used for Blackbody Radiation Law [https://chem.libretexts.org/Bookshelves/Physical_and_Theoretical_Chemistry_Textbook_Maps/Physical_Chemistry_(LibreTexts)/01%3A_The_Dawn_of_the_Quantum_Theory/1.02%3A_Quantum_Hypothesis_Used_for_Blackbody_Radiation_Law]
- 3. Planck constant [https://en.wikipedia.org/wiki/Planck_constant]
- 4. How Max Planck inadvertently kickstarted the Quantum ... [https://bohring.substack.com/p/how-max-planck-inadvertently-kickstarted]
- 5. 2025 is NOT the Quantum Year — This is | by Chris Ferrie [https://csferrie.medium.com/2025-is-not-the-quantum-year-this-is-d62eaad0644b]
- 6. Quantum mechanics: Advancing Quantum Research Through ... [https://quantum100.mdpi.com/]
- 7. Effect of Various Factors on the Accuracy of Determining ... [https://ui.adsabs.harvard.edu/abs/2025Physi...7...37R/abstract]
- 8. Einstein Describes the Photoelectric Effect [https://www.ebsco.com/research-starters/history/einstein-describes-photoelectric-effect]
- 9. Photoelectric effect [https://en.wikipedia.org/wiki/Photoelectric_effect]
- 10. 21.2 Einstein and the Photoelectric Effect - Physics [https://openstax.org/books/physics/pages/21-2-einstein-and-the-photoelectric-effect]
- 11. Einstein and The Photoelectric Effect [https://www.aps.org/apsnews/2005/01/einstein-photoelectric-effect]
- 12. Quantum Information Theory [https://max-planck-quantum-alliance.mpg.de/quantum-information-theory/]
- 13. From Quantum Matter to Quantum Computers [https://www.pks.mpg.de/quant25]
- 14. Franck–Hertz experiment [https://en.wikipedia.org/wiki/Franck%E2%80%93Hertz_experiment]
- 15. Max Planck's Quantum Theory: How Energy Quanta ... [https://www.kroneckerwallis.com/max-plancks-quantum-theory-how-energy-quanta-changed-physics-forever/]
- 16. the franck-hertz experiment- cenco writeup [https://www.phys.ksu.edu/personal/cocke/classes/phys506/Franck-Hertzp3.htm]
- 17. The Franck-Hertz Experiment [https://foothill.edu/psme/marasco/4dlabs/4dlab8.html]
- 18. History and progress on accurate measurements of the ... [https://pubmed.ncbi.nlm.nih.gov/23249618/]
- 19. Compton scattering [https://en.wikipedia.org/wiki/Compton_scattering]
- 20. The Wave–Particle Dualism of Photons as Seen from an ... [https://www.mdpi.com/1099-4300/27/10/1037]
- 21. Famous double-slit experiment holds up when stripped to ... [https://news.mit.edu/2025/famous-double-slit-experiment-holds-when-stripped-to-quantum-essentials-0728]
- 22. 6. Compton Scattering — Modern Lab Experiments ... [https://wanda.fiu.edu/boeglinw/courses/Modern_lab_manual3/Compton_Scattering.html]
- 23. Wave-particle duality using the Compton effect [https://www.sciencedirect.com/science/article/pii/S0375960120306757]
- 24. Compton and X-ray Raman Scattering [https://www.aps.anl.gov/APS-Events/2025-07-16/compton-and-x-ray-raman-scattering]
- 25. Stern–Gerlach experiment [https://en.wikipedia.org/wiki/Stern%E2%80%93Gerlach_experiment]
- 26. How to Choose Color Palettes for Graph and Data ... [https://mindthegraph.com/blog/how-to-choose-color-palettes-for-graph-and-data-visualization/]
- 27. Understanding Success Criterion 1.4.3: Contrast (Minimum) [https://www.w3.org/WAI/WCAG21/Understanding/contrast-minimum.html]
- 28. Color Contrast Guidelines for Text & UI Accessibility [https://daily.dev/blog/color-contrast-guidelines-for-text-and-ui-accessibility]
- 29. Best Color Palettes for Scientific Figures and Data ... [https://www.simplifiedsciencepublishing.com/resources/best-color-palettes-for-scientific-figures-and-data-visualizations]
- 30. 6.3: Photoelectric Effect [https://phys.libretexts.org/Bookshelves/University_Physics/University_Physics_(OpenStax)/University_Physics_III_-_Optics_and_Modern_Physics_(OpenStax)/06%3A_Photons_and_Matter_Waves/6.03%3A_Photoelectric_Effect]
- 31. Photoelectric Effect Experiment - Javalab [https://javalab.org/en/photoelectric_effect_2_en/]
- 32. Planck's Constant Determination [https://sciencedemonstrations.fas.harvard.edu/presentations/plancks-constant-determination]
- 33. Quantum computing 'lie detector' finally proves these ... [https://www.livescience.com/technology/computing/quantum-computing-lie-detector-finally-proves-these-machines-tap-into-einsteins-spooky-action-at-a-distance-rather-than-just-faking-it]
- 34. Effect of Various Factors on the Accuracy of Determining ... [https://www.mdpi.com/2624-8174/7/3/37]
- 35. Planck's Quantum Theory: Is matter a wave? [https://entechonline.com/plancks-quantum-theory-is-matter-a-wave/]
- 36. IPgC-IV [https://www.pmodwrc.ch/en/ipgc-iv/]
- 37. a study of gray radiations of tungsten filament bulb [https://ui.adsabs.harvard.edu/abs/2025EJPh...46b5703R/abstract]
- 38. How Blackbody Calibrator Works — In One Simple Flow ... [https://www.linkedin.com/pulse/how-blackbody-calibrator-works-one-simple-u6klc]
- 39. The Photoelectric Effect | Physics [https://courses.lumenlearning.com/suny-physics/chapter/29-2-the-photoelectric-effect/]
- 40. Measuring Planck's Constant with LED Thresholds for H2 ... [https://eclatinstitute.sg/blog/h2-physics-experiments/Plancks-Constant-LED-Threshold-Experiment]
- 41. Plank's Constant | PDF | Light Emitting Diode | Photon [https://www.scribd.com/document/621651758/Plank-s-constant]
- 42. Kibble balance [https://en.wikipedia.org/wiki/Kibble_balance]
- 43. Watt Balance and Fundamental Constants Measurement [https://www.nature.com/research-intelligence/nri-topic-summaries/watt-balance-and-fundamental-constants-measurement-micro-281847]
- 44. Kibble balance - NPL [https://www.npl.co.uk/research/mass-mechanical-measurement/kibble-balance]
- 45. The watt or Kibble balance: a technique for implementing ... [https://pubmed.ncbi.nlm.nih.gov/35023879/]
- 46. The Kilogram, Reinvented [https://spectrum.ieee.org/the-kilogram-reinvented]
- 47. The watt or Kibble balance: a technique for implementing ... [https://pmc.ncbi.nlm.nih.gov/articles/PMC8752041/]
- 48. Kilogram: The Kibble Balance | NIST [https://www.nist.gov/si-redefinition/kilogram-kibble-balance]
- 49. The watt balance: a technique for implementing the new SI ... [https://www.nist.gov/publications/watt-balance-technique-implementing-new-si-definition-unit-mass]
- 50. An Experimet to Realize the New Definition of the Kilogram [https://www.smaract.com/en/application-examples-1/the-watt-balance-an-experimet-to-realize-the-new-definition-of-the-kilogram]
- 51. NIST's Newest Watt Balance Brings World One Step Closer ... [https://www.nist.gov/news-events/news/2016/06/nists-newest-watt-balance-brings-world-one-step-closer-new-kilogram]
- 52. Experimental determination of partial charges with electron ... [https://www.nature.com/articles/s41586-025-09405-0]
- 53. Millikan's Measurement of Planck's Constant [https://link.aps.org/doi/10.1103/Physics.18.12]
- 54. Theoretical 3D electron diffraction electrostatic potential ... [https://pmc.ncbi.nlm.nih.gov/articles/PMC9344478/]
- 55. 18. The Photo-Electric Effect — Modern Lab Experiments ... [https://wanda.fiu.edu/boeglinw/courses/Modern_lab_manual3/photo_effect.html]
- 56. Photoelectric effect - Experiment [https://www.ises.info/index.php/en/laboratory/experiment/photoelectric-effect-VA/physicalBackground]
- 57. Classroom fundamentals: measuring the Planck constant [https://scienceinschool.org/article/2014/planck/]
- 58. Inspection of micro-LED dies by using liquid crystal films [https://opg.optica.org/ol/abstract.cfm?uri=ol-50-15-4726]
- 59. Minimization of the threshold voltage parameter of the co- ... [https://www.nature.com/articles/s41598-023-39923-8]
- 60. Light Emitting Diode or the LED Tutorial [https://www.electronics-tutorials.ws/diode/diode_8.html]
- 61. Enhanced multicolor LED performance through ... [https://opg.optica.org/oe/abstract.cfm?uri=oe-33-21-43931]
- 62. Exact research on the theory of the blackbody thermal ... [https://pmc.ncbi.nlm.nih.gov/articles/PMC5120273/]
- 63. Quantum blackbody thermometry [https://ui.adsabs.harvard.edu/abs/2021NJPh...23c3037N/abstract]
- 64. Measuring, simulating and optimizing current LED phosphor systems to enhance the visual quality of lighting | Journal of Solid State Lighting | Full Text [https://journalofsolidstatelighting.springeropen.com/articles/10.1186/2196-1107-1-5]
- 65. Up-conversion materials for solid-state lighting | Journal of Sol-Gel Science and Technology [https://link.springer.com/article/10.1007/s10971-024-06577-5]
- 66. The Quantum Paradox in Pharmaceutical Science [https://www.mdpi.com/1422-0067/26/10/4658]
- 67. U-M Quantum Testbed Enables Remote Experiments [https://thequantuminsider.com/2025/09/23/u-m-quantum-testbed-enables-remote-experiments/]
- 68. Demonstration of quantum network protocols over a 14-km ... [https://www.nature.com/articles/s41534-024-00886-x]
- 69. The Quantum-Medical Nexus: Understanding the Impact of ... [https://pmc.ncbi.nlm.nih.gov/articles/PMC10689891/]
- 70. Quantum Internet: Technologies, Protocols, and Research ... [https://arxiv.org/html/2502.01653v3]
- 71. Test Bed: Toward a Network of Programmable Cloud ... [https://www.nsf.gov/funding/opportunities/pcl-test-bed-test-bed-toward-network-programmable-cloud-laboratories]
- 72. Quantum Internet: Technologies, Protocols, and Research ... [https://link.springer.com/article/10.1007/s44227-025-00060-5]
- 73. Planck's Constant Physically Derived Through Quantum ... [https://www.preprints.org/manuscript/202506.1225]
- 74. Planck's Constant Experiment with Lascells [https://vittaeducation.com/plancks-constant-experiment/]
- 75. THE INFLUENCE OF TEMPERATURE ON ... [https://www.sciopen.com/article/10.26599/PHYS.2025.9320248]
- 76. Fundamental Physical Constants - CODATA, Committee on ... [https://codata.org/initiatives/data-science-and-stewardship/fundamental-physical-constants/]
- 77. Planck's Constant 2025 Definitive Best Guide For Space Professionals And Astrophysicists [https://futurafeed.com/plancks-constant-2025-definitive-guide-astrophysics/]
- 78. CODATA Recommended Values of the Fundamental Physical Constants: 2014 | CODATA Blog [https://codata.org/blog/2015/08/04/codata-recommended-values-of-the-fundamental-physical-constants-2014/]
- 79. 5: Measurement of Planck's Constant (Experiment) [https://chem.libretexts.org/Courses/University_of_California_Davis/Chem_4A_Lab%3A_General_Chemistry_for_Majors_I/Chem_4A%3A_Laboratory_Manual/08_5%3A_Measurement_of_Planck's_Constant_(Experiment)]
- 80. Planck's Constant - Experiment [https://www.vernier.com/experiment/phys-abm-22_plancks-constant/?srsltid=AfmBOoow1eFFdVkjMRKlDkr73RQQv_tDbNM_31DLMzikjKQAk-PKoaMX]
- 81. The price of precision: trade-offs between usability and ... [https://www.sciencedirect.com/science/article/pii/S0033350621001256]
- 82. Design of tables for the presentation and ... [https://pmc.ncbi.nlm.nih.gov/articles/PMC10346464/]
- 83. Text has minimum contrast[proposed] | ACT Rule | WAI [https://www.w3.org/WAI/standards-guidelines/act/rules/afw4f7/proposed/]
- 84. State-of-the-art local correlation methods enable affordable ... [https://pubs.rsc.org/en/content/articlelanding/2024/sc/d4sc04755a]
- 85. Correlation in quantum chemical calculation and its effect ... [https://www.sciencedirect.com/science/article/abs/pii/S0010218022002048]
- 86. Many-Worlds Interpretation of Quantum Mechanics [https://plato.stanford.edu/entries/qm-manyworlds/]
- 87. No space, no time, no particles: A radical vision of quantum ... [https://www.newscientist.com/article/2500081-no-space-no-time-no-particles-a-radical-vision-of-quantum-reality/]
- 88. The bizarre quantum paradox of 'negative time' [https://www.bbc.com/future/article/20250306-the-bizarre-quantum-paradox-of-negative-time]
- 89. Diagrams and GPTs for Quantum Gravity [https://quantum-journal.org/views/qv-2024-01-08-78/]
- 90. New quantum visualisation techniques could accelerate ... [https://www.ox.ac.uk/news/2025-05-30-new-quantum-visualisation-techniques-could-accelerate-arrival-fault-tolerant-quantum]